8.31 Crankshaft Position Sensor (Ckp)
Fragment manuala — str. 428–429
📋 Tekst do skopiowania (OCR/wyszukiwanie)
CRANKSHAFT POSITION SENSOR (CKP) 8.31
PREPARE
1. Remove main fuse. See POWER DISCONNECT
(Page 8-4).
2. Remove skid plate. See SKID PLATE (Page 3-92).
3. Remove engine guard (if equipped). See ENGINE
GUARDS (Page 3-94).
4. Remove lower fairings. See FAIRING LOWERS
(Page 3-90).
5. Relocate radiator. See RADIATOR (Page 7-18).
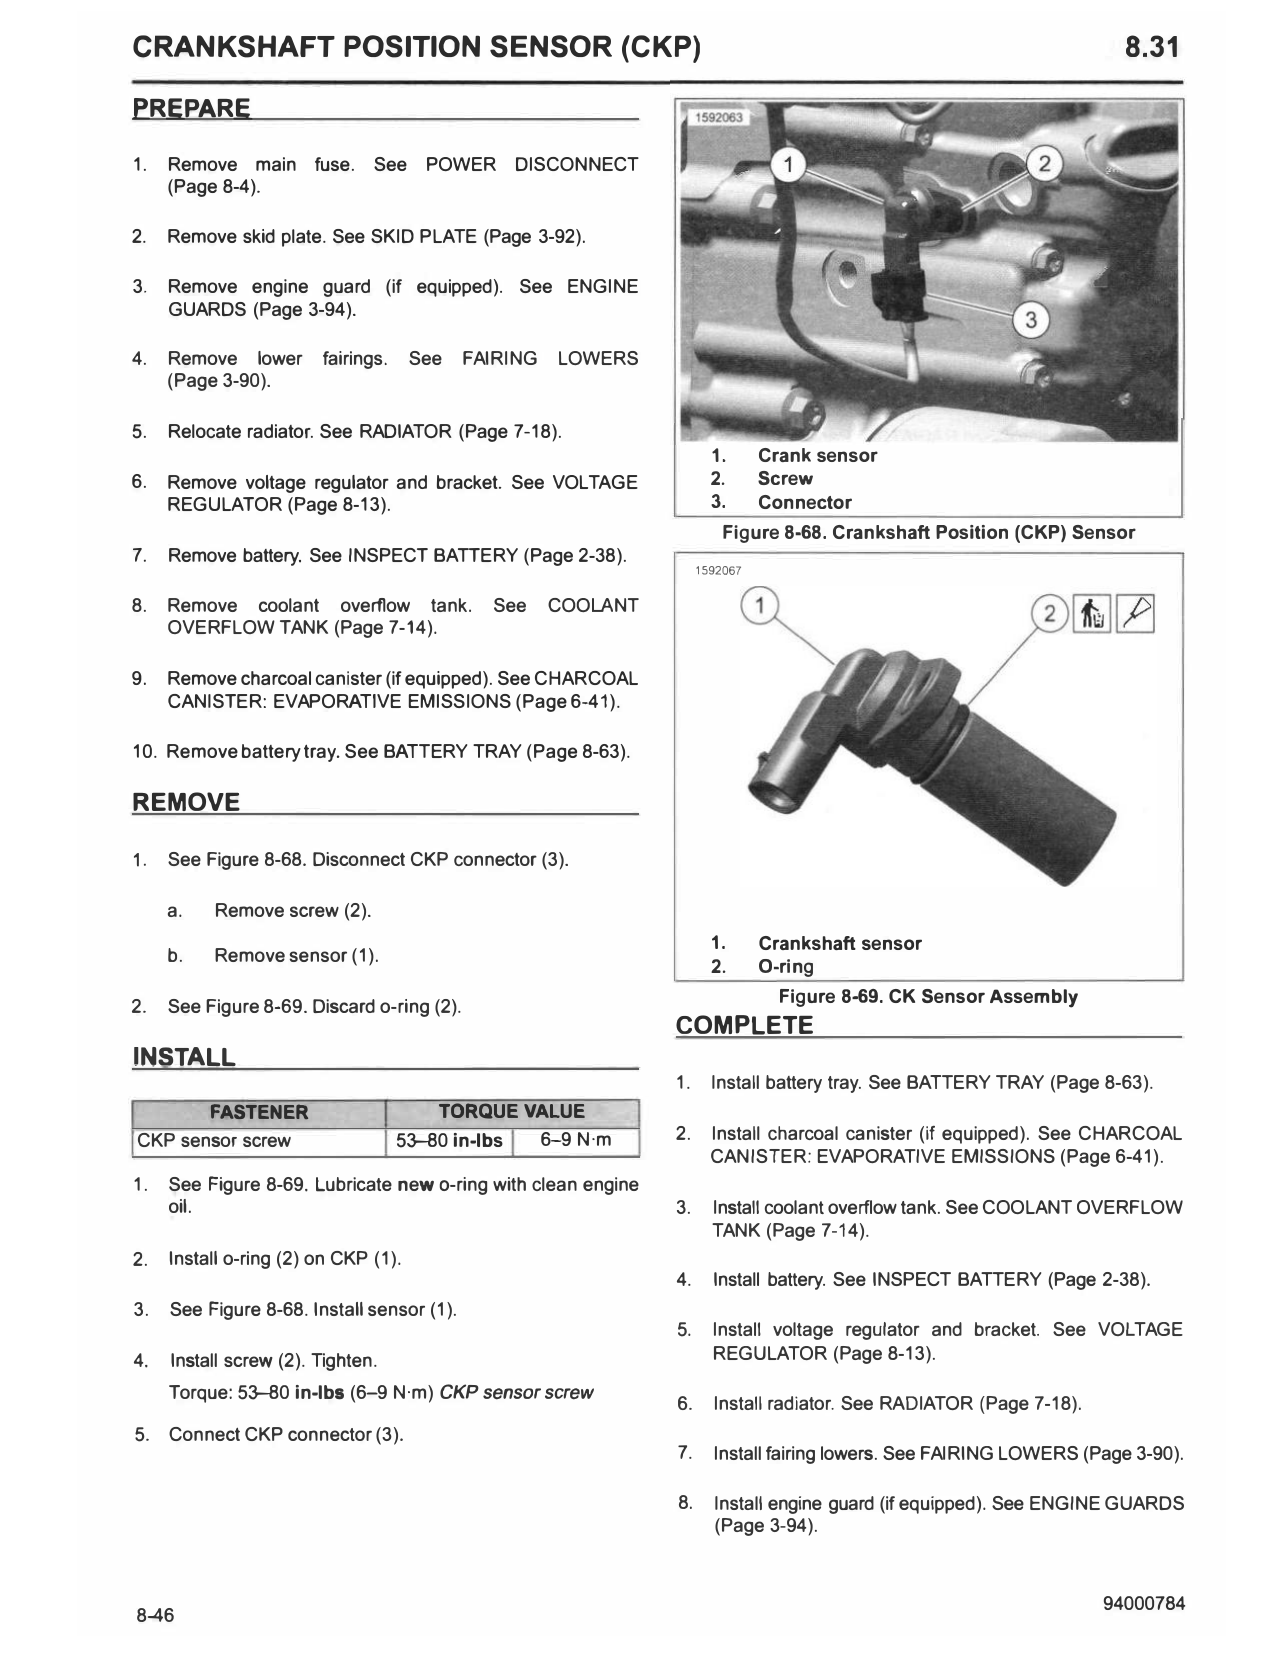
1. Crank sensor
6. Remove voltage regulator and bracket. See VOLTAGE 2. Screw
REGULATOR (Page 8-13). 3. Connector
Figure 8-68. Crankshaft Position (CKP) Sensor
7. Remove battery. See INSPECT BATTERY (Page 2-38).
1592067
8. Remove coolant overflow tank. See COOLANT
OVERFLOW TANK (Page 7-14).
9. Remove charcoal canister (if equipped). See CHARCOAL
CANISTER: EVAPORATIVE EMISSIONS (Page 6-41 ).
10. Remove battery tray. See BATTERY TRAY (Page 8-63).
REMOVE
1. See Figure 8-68. Disconnect CKP connector (3).
a. Remove screw (2).
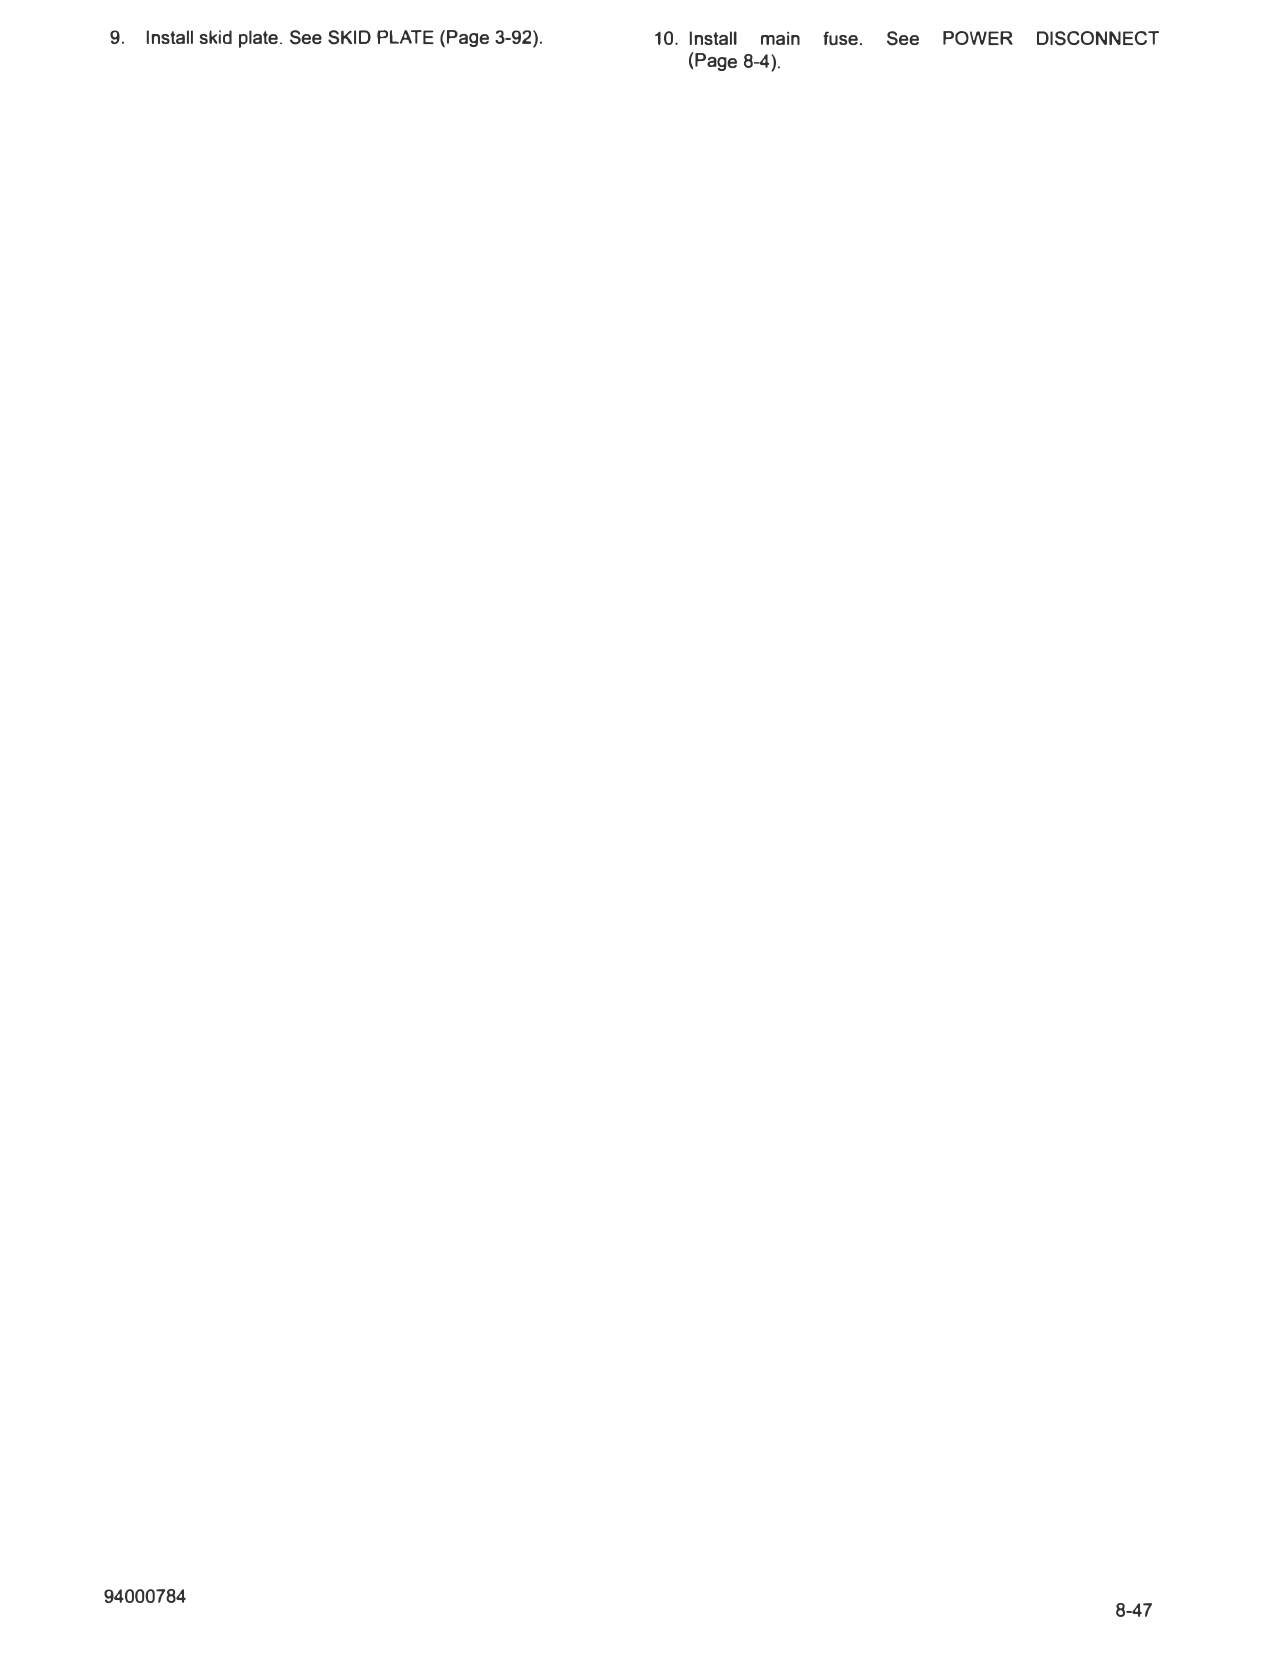
1. Crankshaft sensor
b. Remove sensor (1).
2. O-ring
Figure 8-69. CK Sensor Assembly
2. See Figure 8-69. Discard o-ring (2).
COMPLETE
INSTALL
1. Install battery tray. See BATTERY TRAY (Page 8-63).
FASTENER TORQUE VALUE
CKP sensor screw 5�0 in-lbs 6-9 N·m 2. Install charcoal canister (if equipped). See CHARCOAL
CANISTER: EVAPORATIVE EMISSIONS (Page 6-41).
1. See Figure 8-69. Lubricate new a-ring with clean engine
oil. 3. Install coolant overflow tank. See COOLANT OVERFLOW
TANK (Page 7-14).
2. Install o-ring (2) on CKP (1).
4. Install battery. See INSPECT BATTERY (Page 2-38).
3. See Figure 8-68. Install sensor (1).
5. Install voltage regulator and bracket. See VOLTAGE
4. Install screw (2). Tighten. REGULATOR (Page 8-13).
Torque: 5�0 in-lbs (6-9 N·m) CKP sensor screw
6. Install radiator. See RADIATOR (Page 7-18).
5. Connect CKP connector (3).
7. Install fairing lowers. See FAIRING LOWERS (Page 3-90).
8. Install engine guard (if equipped). See ENGINE GUARDS
(Page 3-94).
9. Install skid plate. See SKID PLATE (Page 3-92). 10. Install main fuse. See POWER DISCONNECT
(Page 8-4).