8.22 Rear Stoplamp Switch
Fragment manuala — str. 418
📋 Tekst do skopiowania (OCR/wyszukiwanie)
REAR STOPLAMP SWITCH 8.22
PREPARE 3. Install connector (1).
1. Remove main fuse. See POWER DISCONNECT
(Page 8-4).
2. Remove seat. See SEAT (Page 3-113).
REMOVE
NOTICE
DOT 4 brake fluid will damage painted and body panel
surfaces it comes in contact with. Always use caution and
protect surfaces from spills whenever brake work is
performed. Failure to comply can result in cosmetic
damage. (00239c)
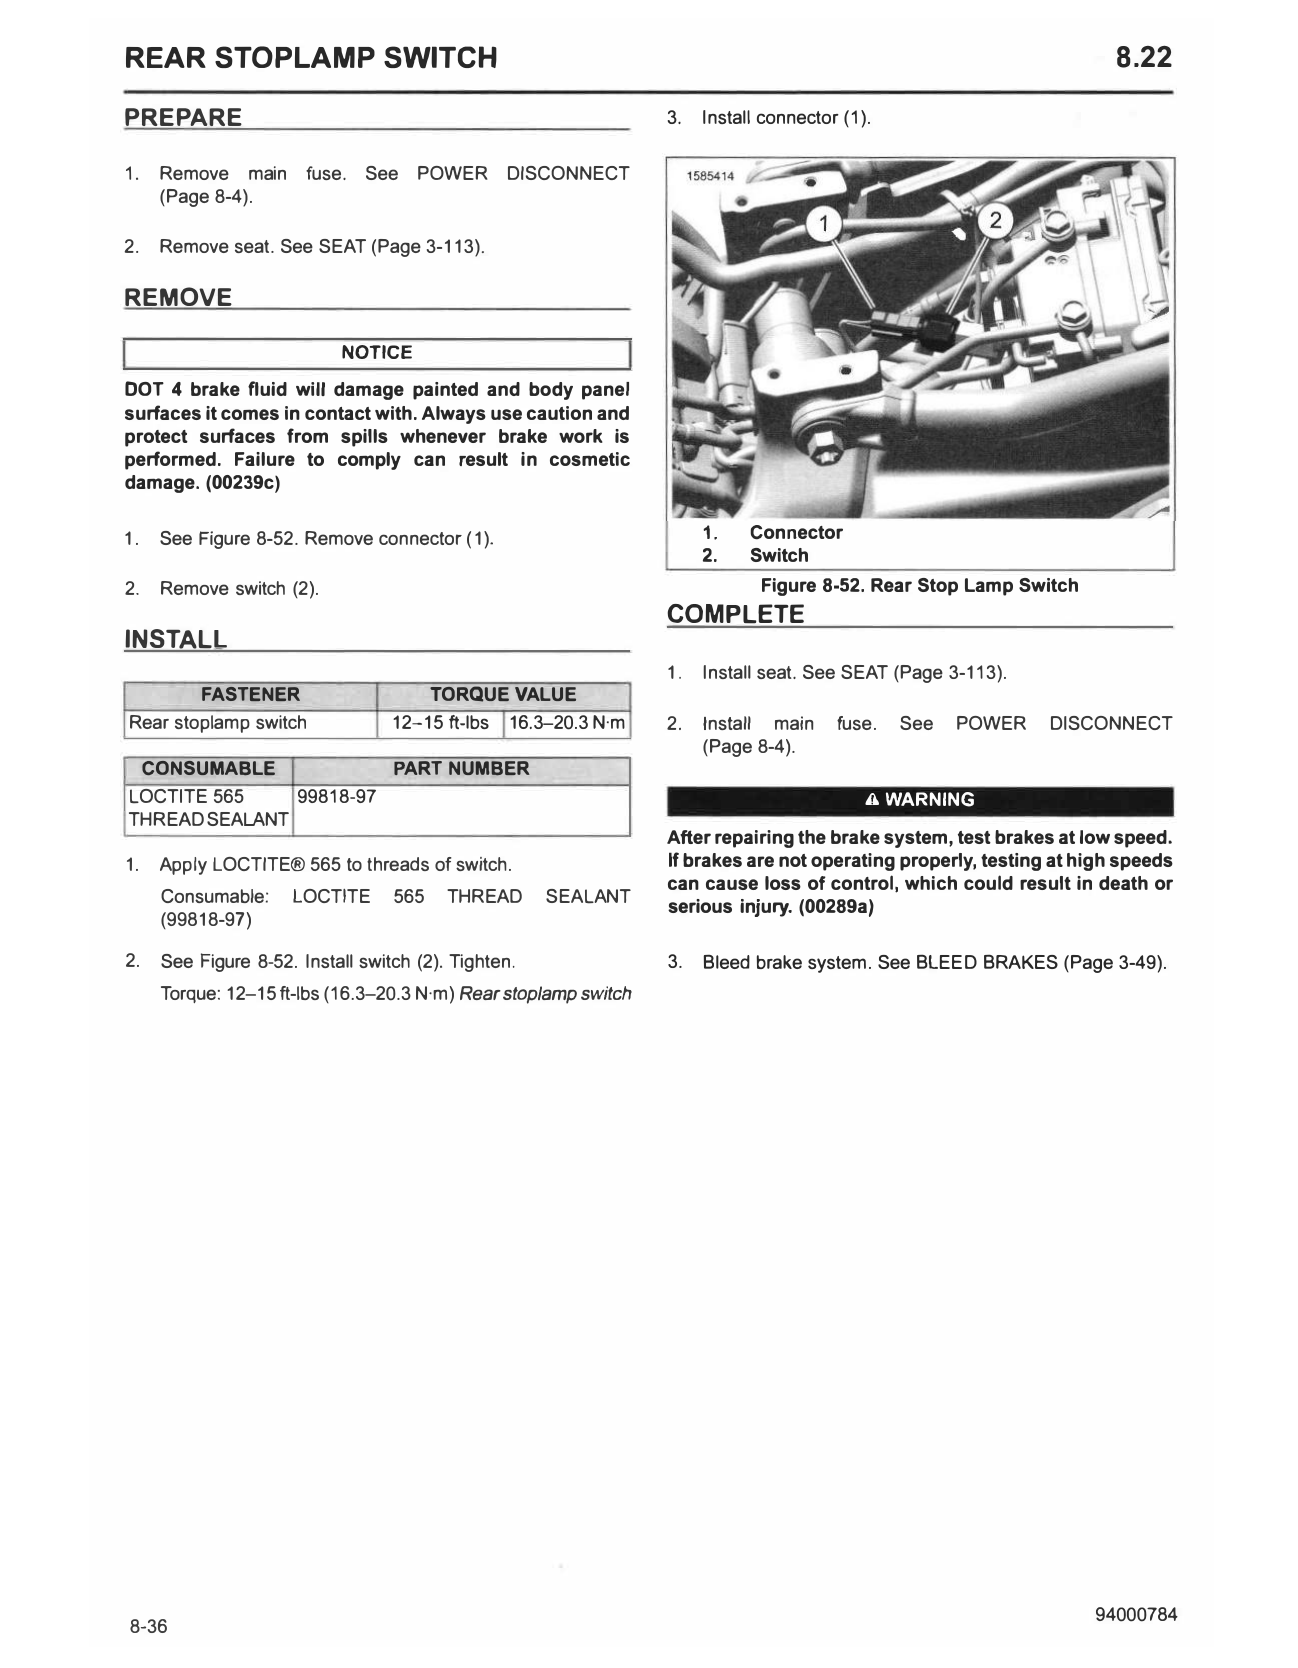
1. See Figure 8-52. Remove connector (1). 1. Connector
2. Switch
2. Remove switch (2). Figure 8-52. Rear Stop Lamp Switch
COMPLETE
INSTALL
1. Install seat. See SEAT (Page 3-113).
FASTENER TORQUE VALUE
Rear stoplamp switch 12-15 ft-lbs 16.3--20.3 N·m 2. Install main fuse. See POWER DISCONNECT
(Page 8-4).
CONSUMABLE PART NUMBER
LOCTITE 565 99818-97 A WARNING
THREAD SEALANT
After repairing the brake system, test brakes at low speed.
1. Apply LOCTITE® 565 to threads of switch. If brakes are not operating properly, testing at high speeds
can cause loss of control, which could result in death or
Consumable: LOCTITE 565 THREAD SEALANT
serious injury. (00289a)
(99818-97)
2. See Figure 8-52. Install switch (2). Tighten. 3. Bleed brake system. See BLEED BRAKES (Page 3-49).
Torque: 12-15 ft-lbs (16.3-20.3 N·m) Rear stop/amp switch