8.16 Headlamp
Fragment manuala — str. 410–411
📋 Tekst do skopiowania (OCR/wyszukiwanie)
HEADLAMP 8.16
PREPARE c. Draw a vertical line (2) on wall.
d. Point the front wheel straight forward at wall.
1. Remove main fuse. See POWER DISCONNECT
(Page 8-4). e. Measure distance (4) from floor to center of low
beam.
2. Remove fairing. See FAIRING (Page 3-89).
f. With the low beam activated, verify headlamp
REMOVE alignment.
g. Adjust as necessary.
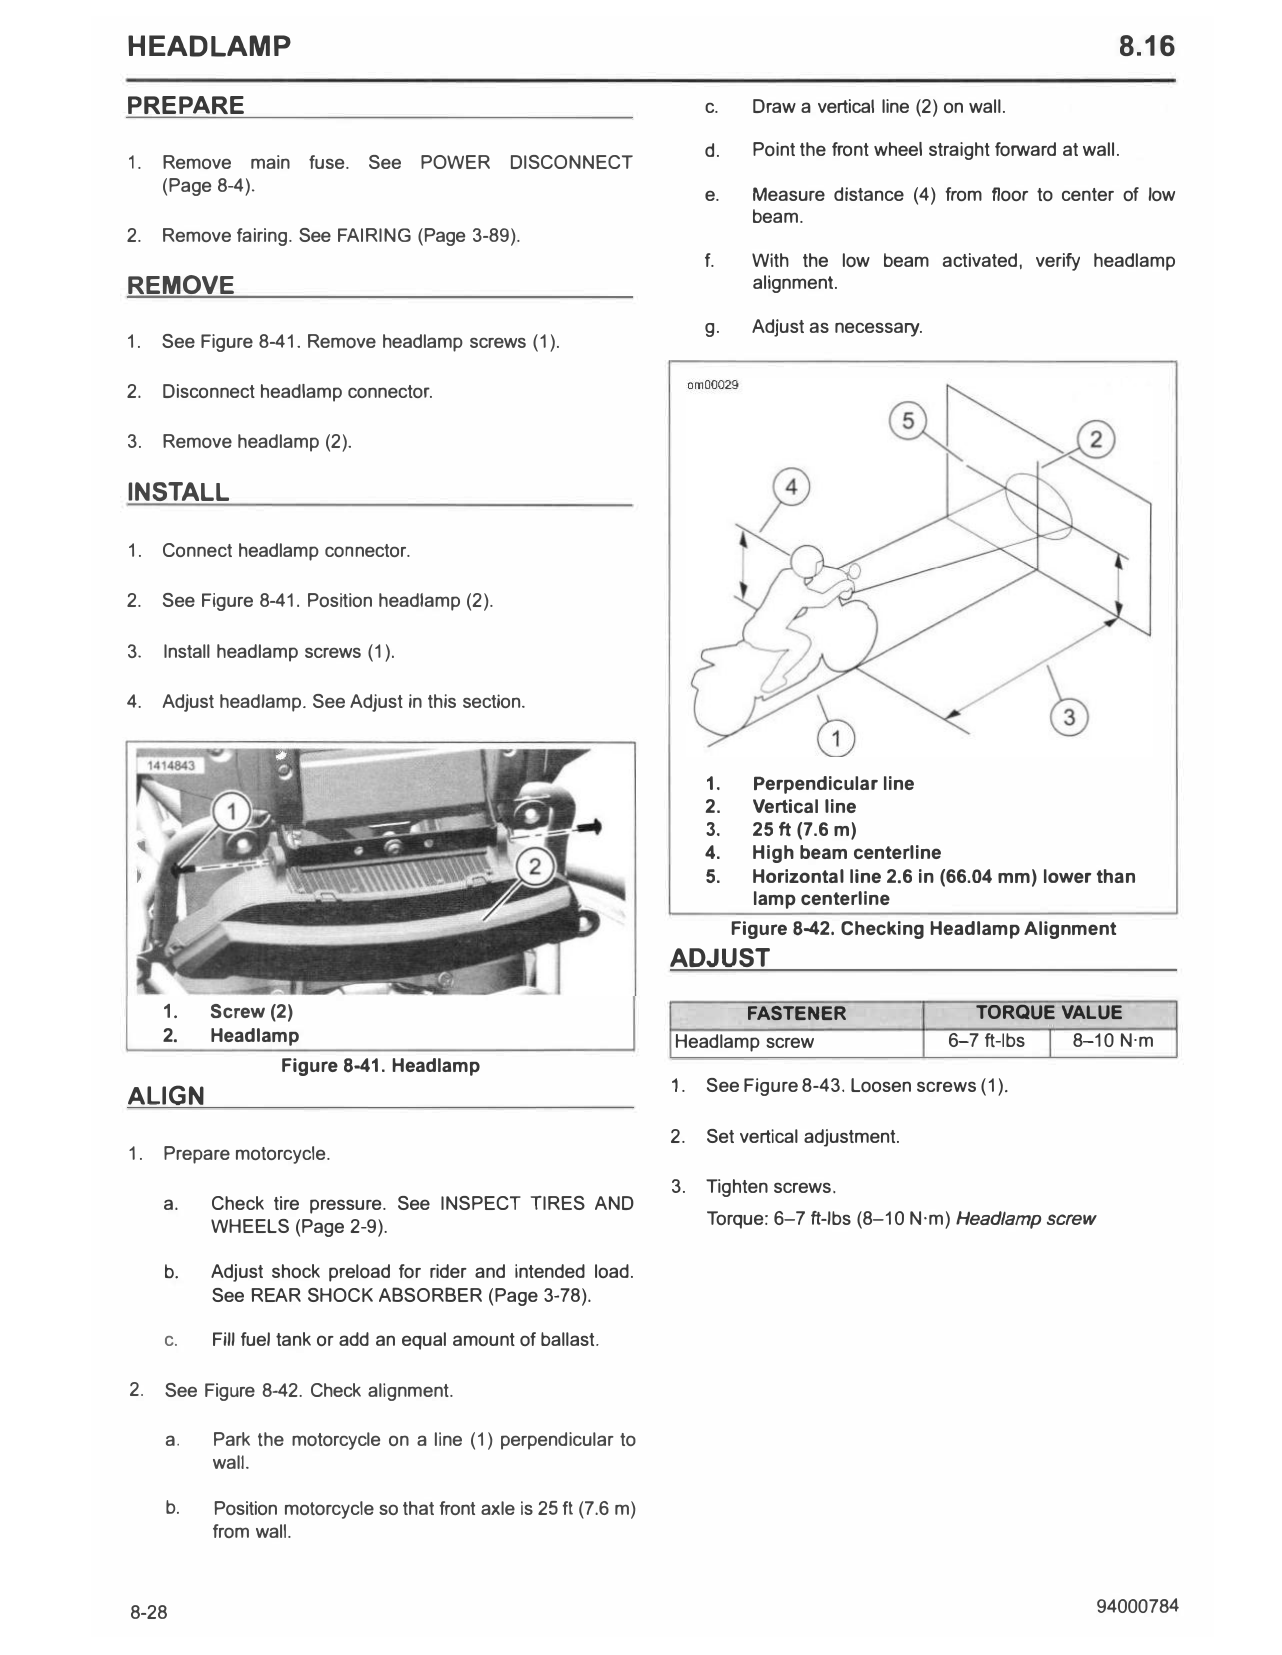
1. See Figure 8-41. Remove headlamp screws (1).
2. Disconnect headlamp connector.
3. Remove headlamp (2).
INSTALL
1. Connect headlamp connector.
2. See Figure 8-41. Position headlamp (2).
3. Install headlamp screws (1).
4. Adjust headlamp. See Adjust in this section.
1. Perpendicular line
2. Vertical line
3. 25 ft (7.6 m)
4. High beam centerline
5. Horizontal line 2.6 in (66.04 mm) lower than
lamp centerline
Figure 8-42. Checking Headlamp Alignment
ADJUST
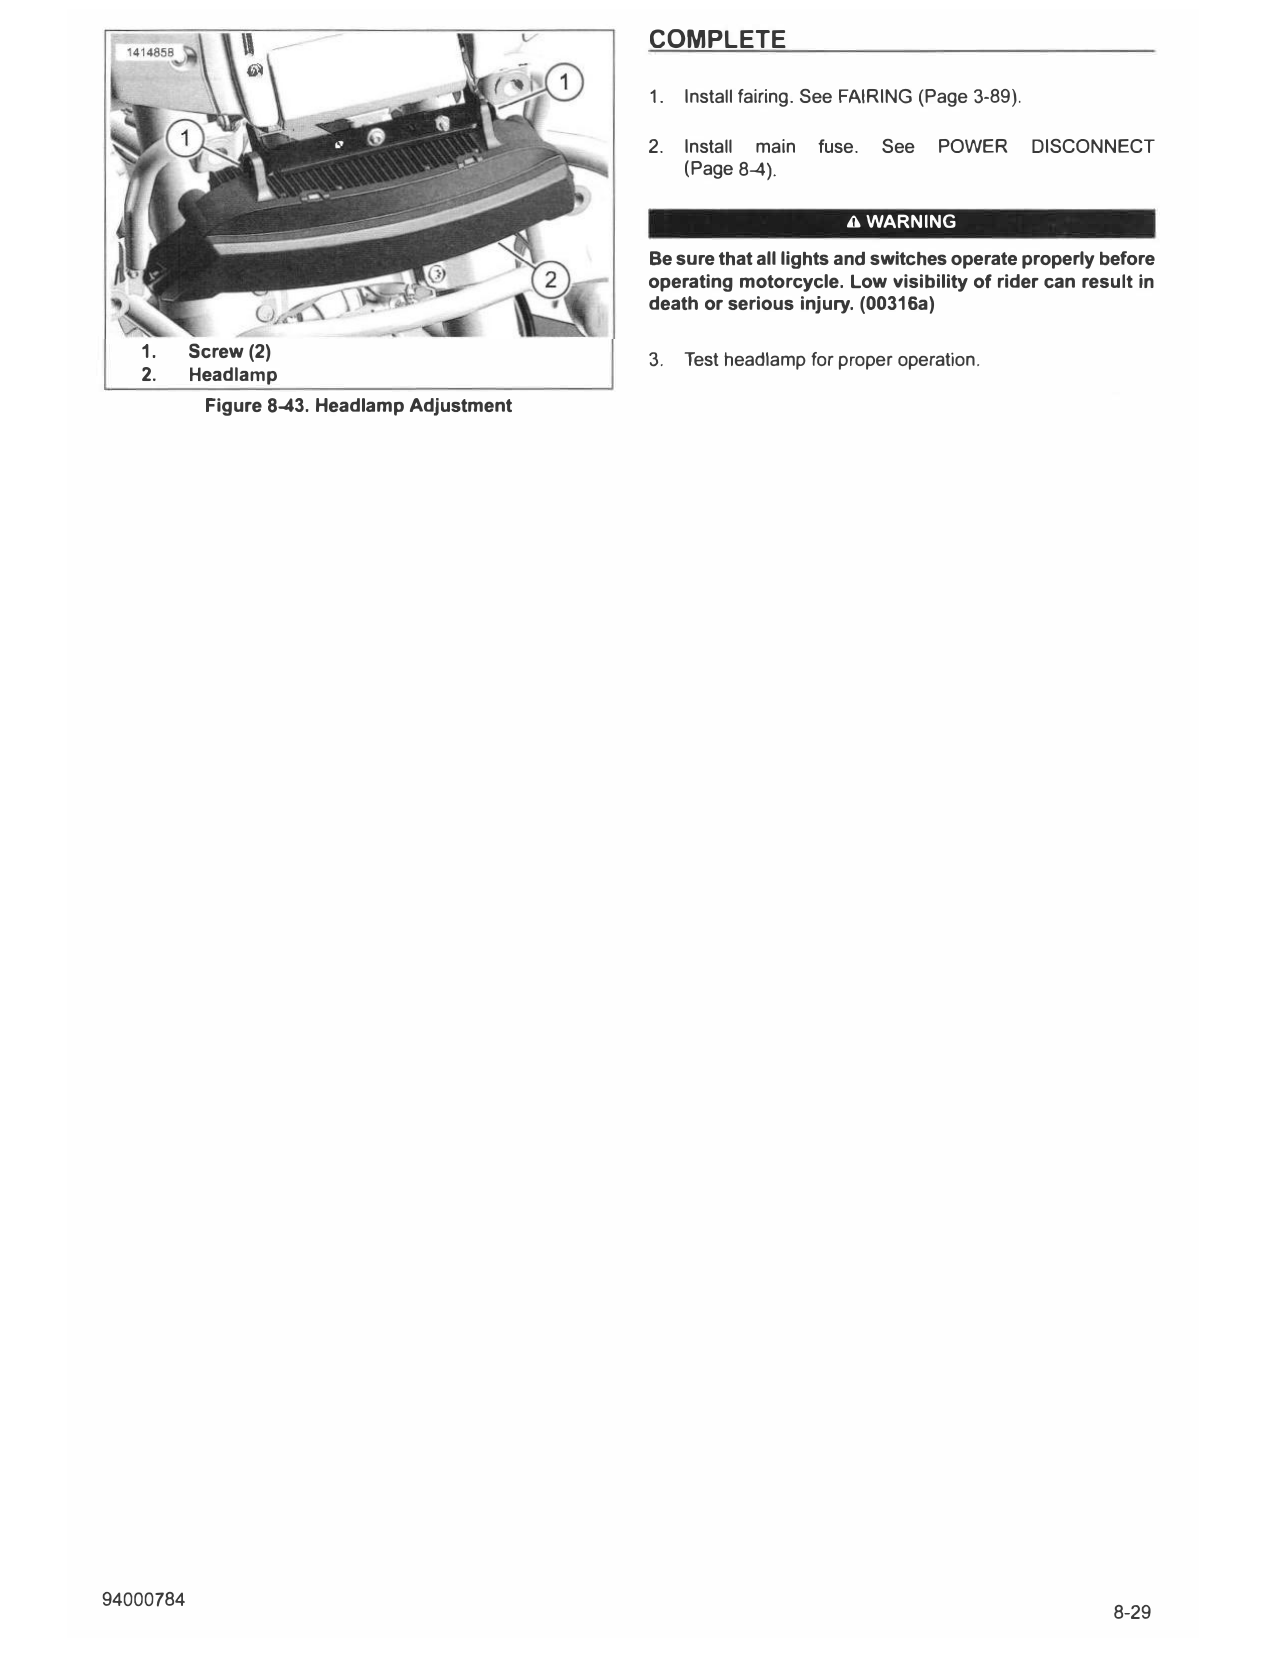
1. Screw (2) FASTENER TORQUE VALUE
2. Headlamp Headlamp screw 6-7 ft-lbs 8-10 N·m
Figure 8-41. Headlamp
1. See Figure 8-43. Loosen screws (1).
ALIGN
2. Set vertical adjustment.
1. Prepare motorcycle.
3. Tighten screws.
a. Check tire pressure. See INSPECT TIRES AND
WHEELS (Page 2-9). Torque: 6-7 ft-lbs (8-10 N·m) Headlamp screw
b. Adjust shock preload for rider and intended load.
See REAR SHOCK ABSORBER (Page 3-78).
c. Fill fuel tank or add an equal amount of ballast.
2. See Figure 8-42. Check alignment.
a. Park the motorcycle on a line (1) perpendicular to
wall.
b. Position motorcycle so that front axle is 25 ft (7.6 m)
from wall.
8-28 94000784
COMPLETE
1. Install fairing. See FAIRING (Page 3-89).
2. Install main fuse. See POWER DISCONNECT
(Page 8-4).
A WARNING
Be sure that all lights and switches operate properly before
operating motorcycle. Low visibility of rider can result in
death or serious injury. (00316a)
1. Screw (2) 3. Test headlamp for proper operation.
2. Headlamp
Figure 8-43. Headlamp Adjustment