7.11 Radiator
Fragment manuala — str. 378–380
📋 Tekst do skopiowania (OCR/wyszukiwanie)
RADIATOR 7.11
RELOCATE RADIATOR FOR SERVICE
FASTENER TORQUE VALUE
Radiator mounting screws 70.8-88.5in�bs 8-10 N·m
Prepare
1. Remove main fuse. See POWER DISCONNECT
(Page 8-4).
2. Remove skid plate. See SKID PLATE (Page 3-92).
3. Remove engine guards. See ENGINE GUARDS
(Page 3-94).
4. Remove fairing lowers. See FAIRING LOWERS
(Page 3-90).
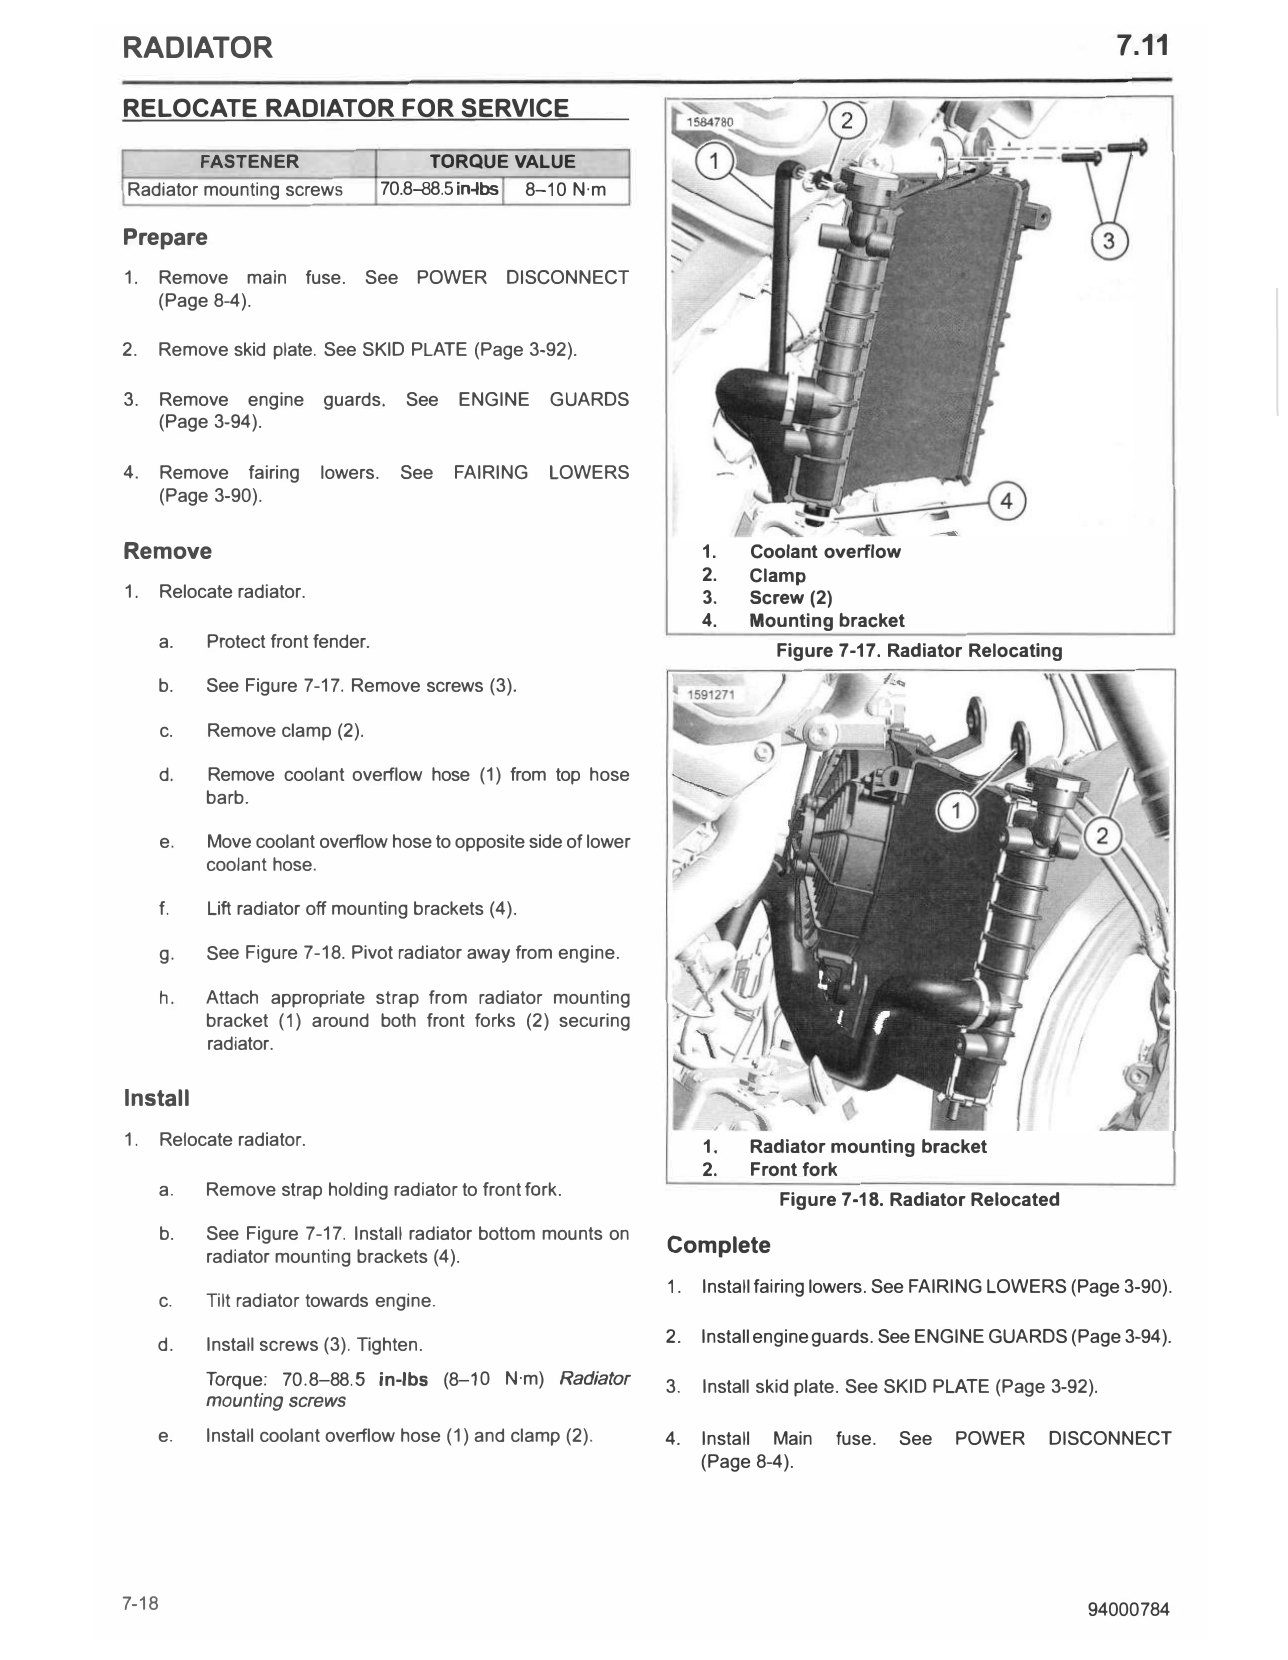
Remove 1. Coolant overflow
2. Clamp
1. Relocate radiator. 3. Screw (2)
4. Mounting bracket
a. Protect front fender. Figure 7-17. Radiator Relocating
b. See Figure 7-17. Remove screws (3).
c. Remove clamp (2).
d. Remove coolant overflow hose (1) from top hose
barb.
e. Move coolant overflow hose to opposite side of lower
coolant hose.
f. Lift radiator off mounting brackets (4).
g. See Figure 7-18. Pivot radiator away from engine.
h. Attach appropriate strap from radiator mounting
bracket (1) around both front forks (2) securing
radiator.
Install
1. Relocate radiator. 1. Radiator mounting bracket
2. Front fork
a. Remove strap holding radiator to front fork.
Figure 7-18. Radiator Relocated
b. See Figure 7-17. Install radiator bottom mounts on
radiator mounting brackets (4).
Complete
1. Install fairing lowers. See FAIRING LOWERS (Page 3-90).
c. Tilt radiator towards engine.
d. Install screws (3). Tighten. 2. Install engine guards. See ENGINE GUARDS (Page 3-94).
Torque: 70.8-88.5 in-lbs (8-10 N·m) Radiator 3. Install skid plate. See SKID PLATE (Page 3-92).
mounting screws
e. Install coolant overflow hose (1) and clamp (2). 4. Install Main fuse. See POWER DISCONNEC T
(Page 8-4).
7-18 94000784
REMOVE AND INSTALL: RADIATOR e. Install screws (3). Tighten.
Torque: 71-89 in-lbs (8-10 N·m) Radiator mounting
FASTENER TORQUE VALUE screw
Radiator mounting screw 71-89 in-lbs 8-10 N·m
2. Attach coolant overflow hose.
Prepare
a. Clean hose barb. Clean inside of overflow hose (1)
1. Remove main fuse. See POWER DISCONNECT end.
(Page 8-4).
b. Install overflow hose.
2. Drain coolant. See COOLANT (Page 7-8).
c. Secure with clamp (2).
3. Remove skid plate. See SKID PLATE (Page 3-92).
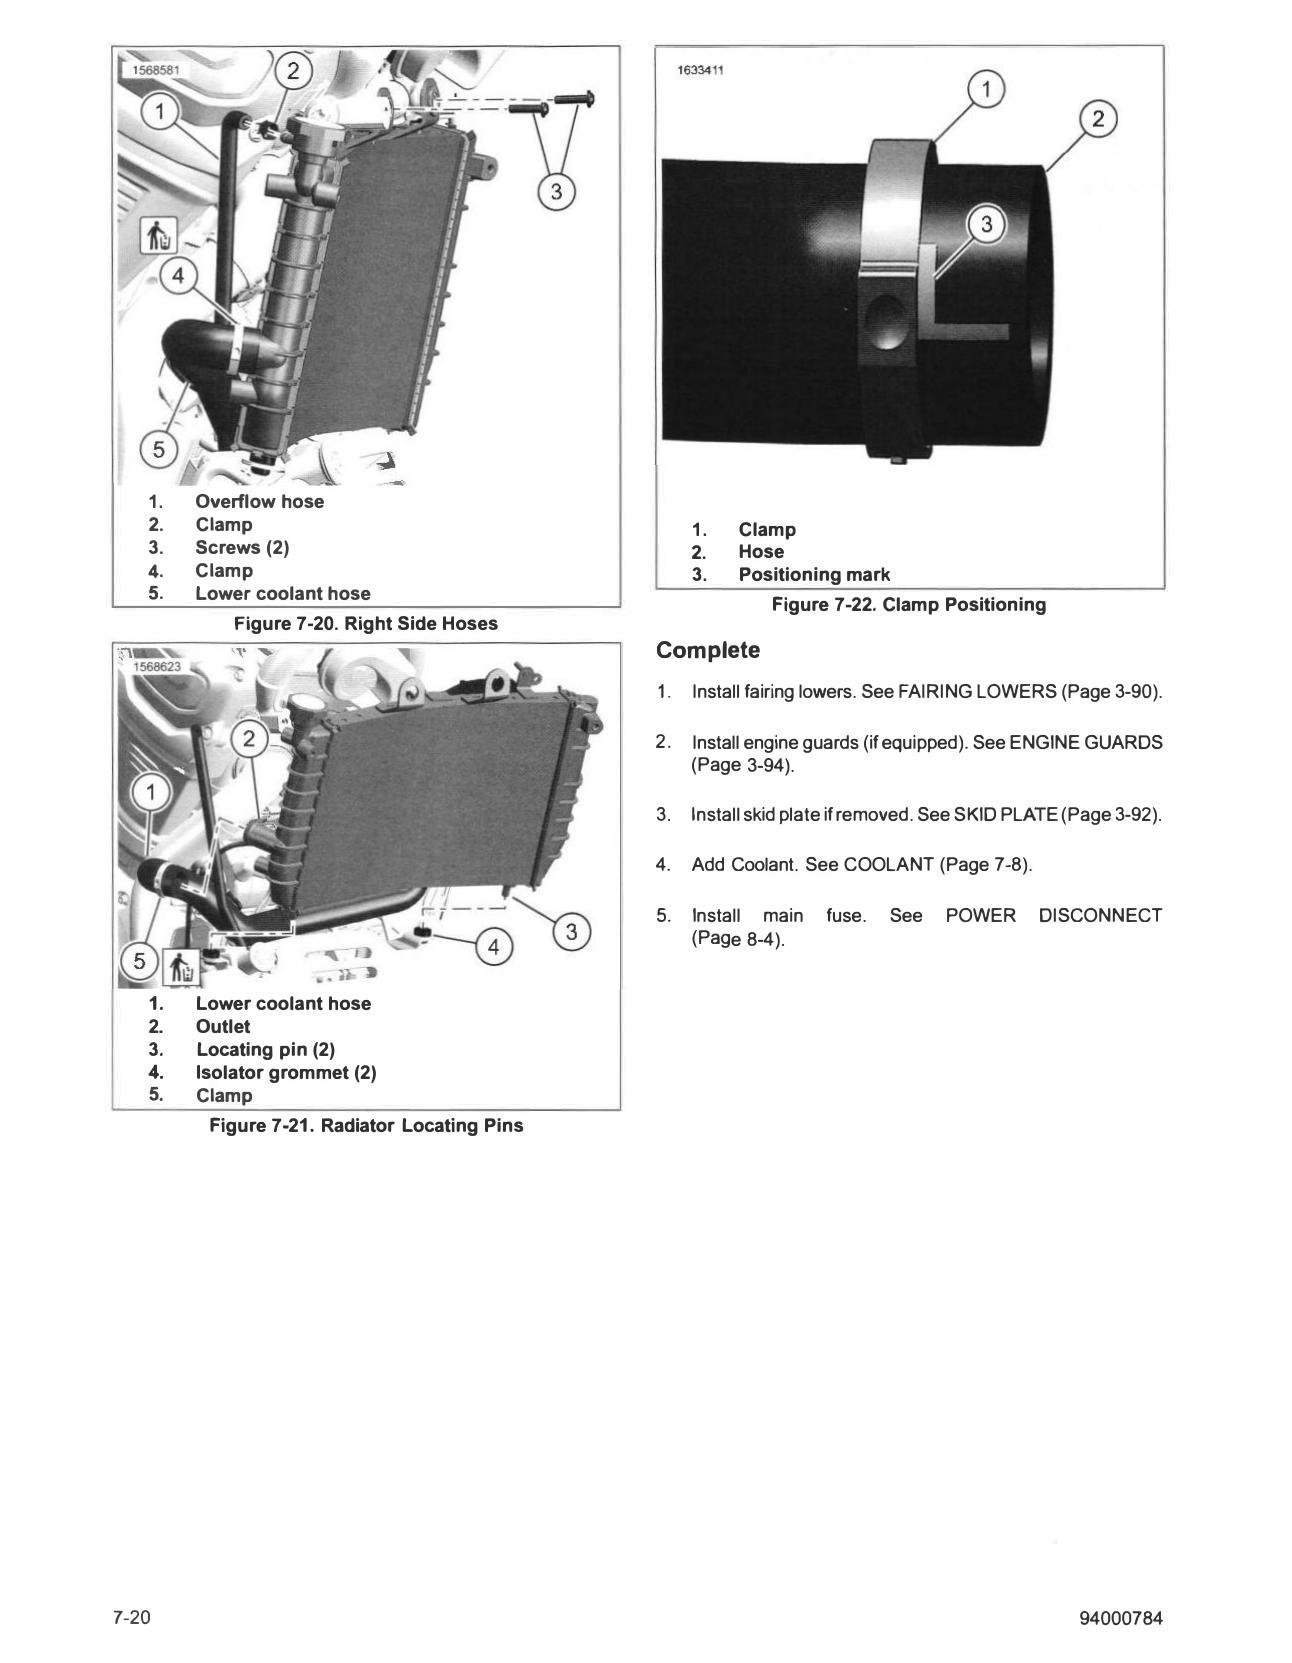
3. Install coolant hoses.
4. Remove engine guards (if equipped). See ENGINE NOTE
GUARDS (Page 3-94). See Figure 7-22. Install clamps (1) on positioning marks
(3) as shown for all coolant hoses (2).
5. Remove fairing lowers. See FAIRING LOWERS
(Page 3-90). a. See Figure 7-19. Attach lower coolant hose (6).
Remove b. Secure with new clamp (5).
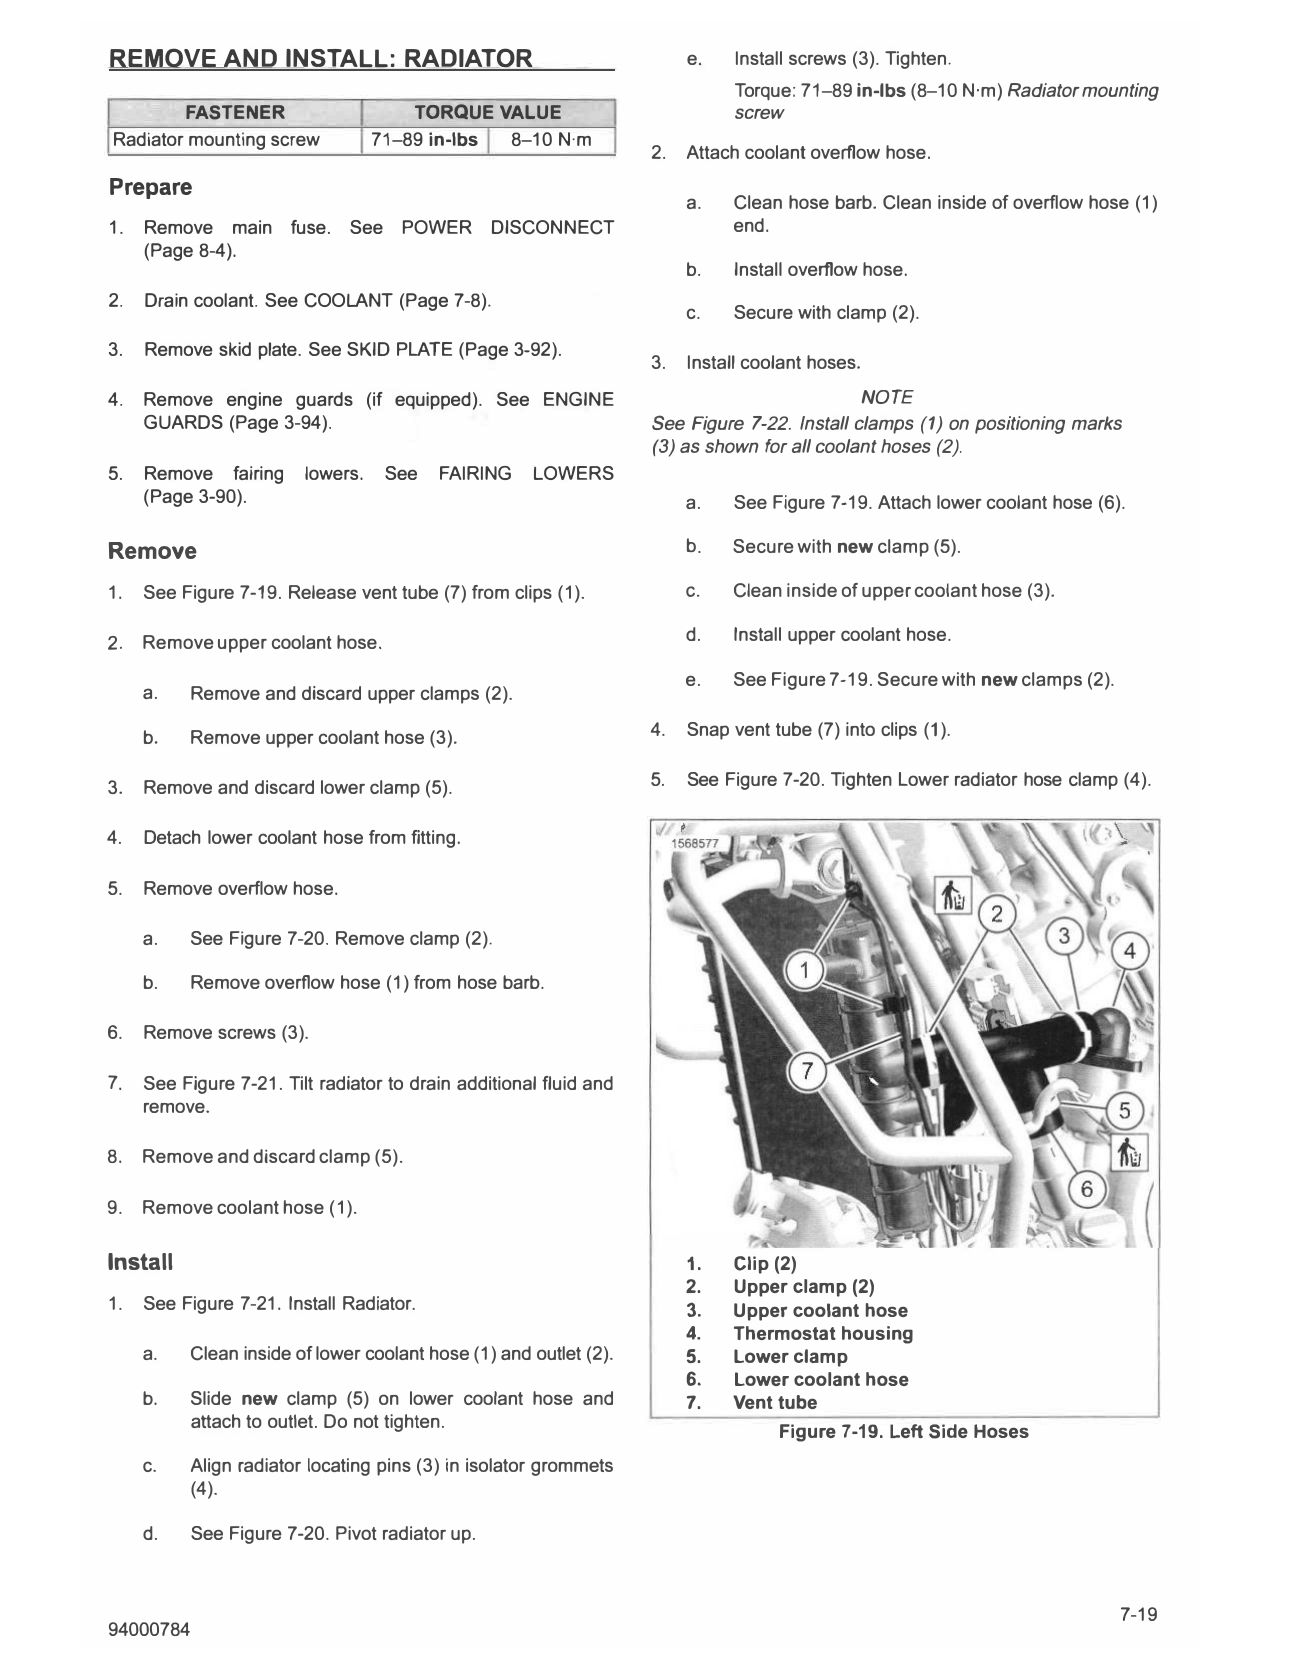
1. See Figure 7-19. Release vent tube (7) from clips (1). c. Clean inside of upper coolant hose (3).
2. Remove upper coolant hose. d. Install upper coolant hose.
e. See Figure 7-19. Secure with new clamps (2).
a. Remove and discard upper clamps (2).
b. Remove upper coolant hose (3). 4. Snap vent tube (7) into clips (1 ).
3. Remove and discard lower clamp (5). 5. See Figure 7-20. Tighten Lower radiator hose clamp (4).
4. Detach lower coolant hose from fitting.
5. Remove overflow hose.
a. See Figure 7-20. Remove clamp (2).
b. Remove overflow hose (1) from hose barb.
6. Remove screws (3).
7. See Figure 7-21. Tilt radiator to drain additional fluid and
remove.
8. Remove and discard clamp (5).
9. Remove coolant hose (1).
Install 1. Clip (2)
2. Upper clamp (2)
1. See Figure 7-21. Install Radiator. 3. Upper coolant hose
4. Thermostat housing
a. Clean inside of lower coolant hose (1) and outlet (2). 5. Lower clamp
6. Lower coolant hose
b. Slide new clamp (5) on lower coolant hose and 7. Vent tube
attach to outlet. Do not tighten.
Figure 7-19. Left Side Hoses
c. Align radiator locating pins (3) in isolator grommets
(4).
d. See Figure 7-20. Pivot radiator up.
1. Overflow hose
2. Clamp 1. Clamp
3. Screws (2) 2. Hose
4. Clamp 3. Positioning mark
5. Lower coolant hose
Figure 7-22. Clamp Positioning
Figure 7-20. Right Side Hoses
Complete
1. Install fairing lowers. See FAIRING LOWERS (Page 3-90).
2. Install engine guards (if equipped). See ENGINE GUARDS
(Page 3-94).
3. Install skid plate if removed. See SKID PLATE (Page 3-92).
4. Add Coolant. See COOLANT (Page 7-8).
5. Install main fuse. See POWER DISCONNECT
(Page 8-4).
1. Lower coolant hose
2. Outlet
3. Locating pin (2)
4. Isolator grommet (2)
5. Clamp
Figure 7-21. Radiator Locating Pins
7-20 94000784