6.29 Purge Lines: Evaporative Emissions
Fragment manuala — str. 356–358

📋 Tekst do skopiowania (OCR/wyszukiwanie)
PURGE LINES: EVAPORATIVE EMISSIONS 6.29
PREPARE 1629177
1. Remove fairing. See FAIRING (Page 3-89).
2. Remove seat. See SEAT (Page 3-113).
3. Remove console. See CONSOLE (Page 6-7).
4. Remove skid plate. See SKID PLATE (Page 3-92).
5. Remove left engine guard. See ENGINE GUARDS
(Page 3-94).
6. Remove left fairing lower. See FAIRING LOWERS
(Page 3-90).
REMOVE AND INSTALL: VAPOR VENT LINE
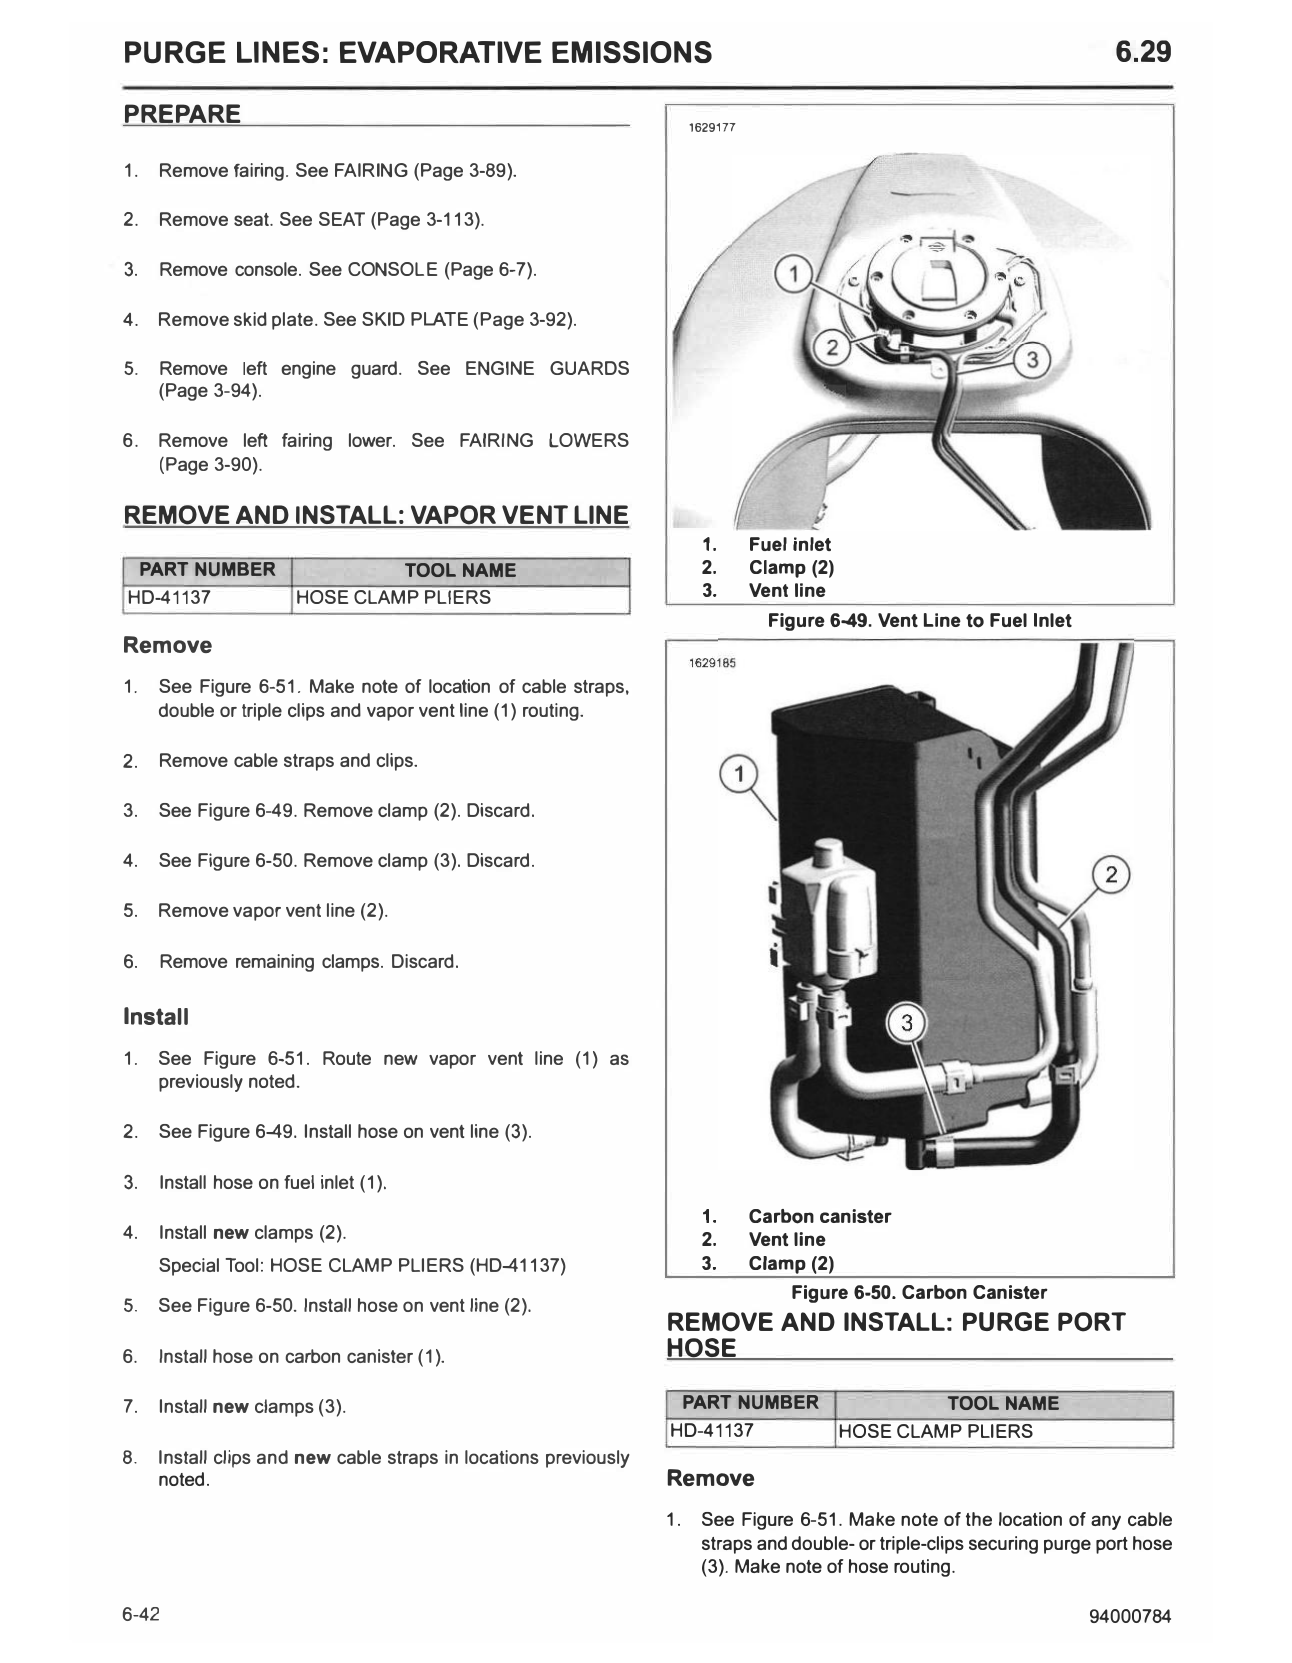
1. Fuel inlet
PARTNUMBER TOOLNAME 2. Clamp (2)
HD-41137 HOSE CLAMP PLIERS 3. Vent line
Figure 6-49. Vent Line to Fuel Inlet
Remove
1. See Figure 6-51. Make note of location of cable straps,
double or triple clips and vapor vent line (1) routing.
2. Remove cable straps and clips.
3. See Figure 6-49. Remove clamp (2). Discard.
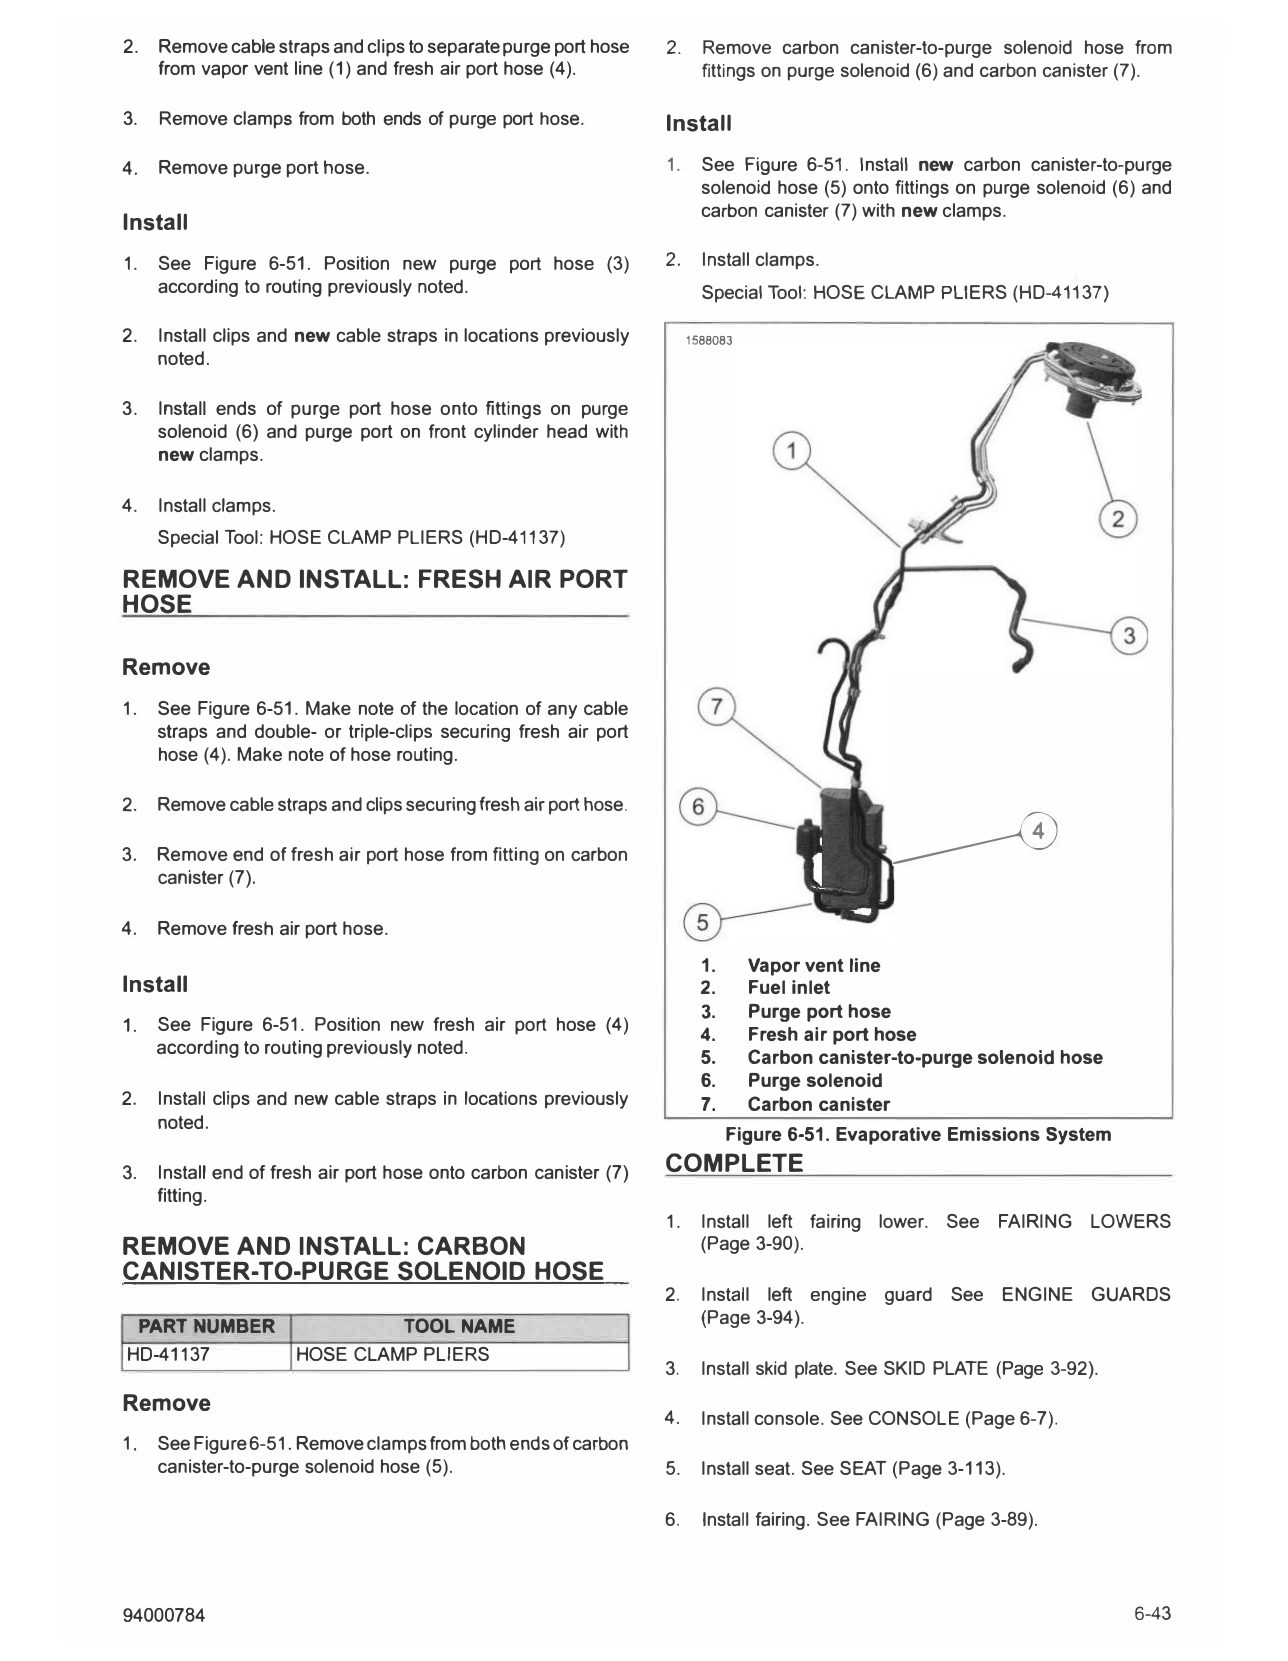
4. See Figure 6-50. Remove clamp (3). Discard.
5. Remove vapor vent line (2).
6. Remove remaining clamps. Discard.
Install
1. See Figure 6-51. Route new vapor vent line (1) as
previously noted.
2. See Figure 6-49. Install hose on vent line (3).
3. Install hose on fuel inlet (1).
1. Carbon canister
4. Install new clamps (2). 2. Vent line
Special Tool: HOSE CLAMP PLIERS (HD-41137) 3. Clamp (2)
Figure 6-50. Carbon Canister
5. See Figure 6-50. Install hose on vent line (2).
REMOVE AND INSTALL: PURGE PORT
6. Install hose on carbon canister (1). HOSE
7. Install new clamps (3). PARTNUMBER TOOLNAME
HD-41137 HOSE CLAMP PLIERS
8. Install clips and new cable straps in locations previously
noted. Remove
1. See Figure 6-51. Make note of the location of any cable
straps and double- or triple-clips securing purge port hose
(3). Make note of hose routing.
6-42 94000784
2. Remove cable straps and clips to separate purge port hose 2. Remove carbon canister-to-purge solenoid hose from
from vapor vent line (1) and fresh air port hose (4). fittings on purge solenoid (6) and carbon canister (7).
3. Remove clamps from both ends of purge port hose. Install
4. Remove purge port hose. 1. See Figure 6-51. Install new carbon canister-to-purge
solenoid hose (5) onto fittings on purge solenoid (6) and
carbon canister (7) with new clamps.
Install
1. See Figure 6-51. Position new purge port hose (3) 2. Install clamps.
according to routing previously noted. Special Tool: HOSE CLAMP PLIERS (HD-41137)
2. Install clips and new cable straps in locations previously 1588083
noted.
3. Install ends of purge port hose onto fittings on purge
solenoid (6) and purge port on front cylinder head with
new clamps.
4. Install clamps.
Special Tool: HOSE CLAMP PLIERS (HD-41137)
REMOVE AND INSTALL: FRESH AIR PORT
HOSE
Remove
1. See Figure 6-51. Make note of the location of any cable
straps and double- or triple-clips securing fresh air port
hose (4). Make note of hose routing.
2. Remove cable straps and clips securing fresh air port hose.
3. Remove end of fresh air port hose from fitting on carbon
canister (7).
_______-0
4. Remove fresh air port hose.
1. Vapor vent line
Install 2. Fuel inlet
3. Purge port hose
1. See Figure 6-51. Position new fresh air port hose (4)
4. Fresh air port hose
according to routing previously noted.
5. Carbon canister-to-purge solenoid hose
6. Purge solenoid
2. Install clips and new cable straps in locations previously 7. Carbon canister
noted.
Figure 6-51. Evaporative Emissions System
3. Install end of fresh air port hose onto carbon canister (7) COMPLETE
fitting.
1. Install left fairing lower. See FAIRING LOWERS
REMOVE AND INSTALL: CARBON (Page 3-90).
CANISTER-TO-PURGE SOLENOID HOSE
2. Install left engine guard See ENGINE GUARDS
(Page 3-94).
PART NUMBER TOOL NAME
HD-41137 HOSE CLAMP PLIERS
3. Install skid plate. See SKID PLATE (Page 3-92).
Remove
4. Install console. See CONSOLE (Page 6-7).
1. See Figure 6-51. Remove clamps from both ends of carbon
canister-to-purge solenoid hose (5). 5. Install seat. See SEAT (Page 3-113).
6. Install fairing. See FAIRING (Page 3-89).
94000784 6-43
NOTES