4.21 Primary Cover
Fragment manuala — str. 253–254
📋 Tekst do skopiowania (OCR/wyszukiwanie)
PRIMARY COVER 4.21
PREPARE 3. Install primary cover.
1. Remove main fuse. See POWER DISCONNECT a. Rotate clutch actuator (2) counter-clockwise.
(Page 8-4).
b. Align and install primary cover (7) to engine.
2. Disconnect clutch cable. See CLUTCH CONTROL c. Rotate clutch actuator (2) clockwise to set cover (7)
(Page 3-82) in place and to engage the clutch mechanism.
3. Drain engine oil. See REPLACE ENGINE OIL AND FILTER d. Install screws (1).
(Page 2-7).
4. See Figure 4-53. Tighten screws in sequence.
4. Remove center stand (if equipped). See CENTER STAND
Torque: 94-115 in-lbs (10.6-13 N·m) Primary cover
(Page 3-111).
screws
5. Remove radiator mounting screws and position radiator
away from oil cooler. Support as needed. See RADIATOR
(Page 7-18).
a. Do not disconnect coolant hoses.
6. Remove exhaust header. See EXHAUST SYSTEM
(Page 6-37).
REMOVE
Primary Cover
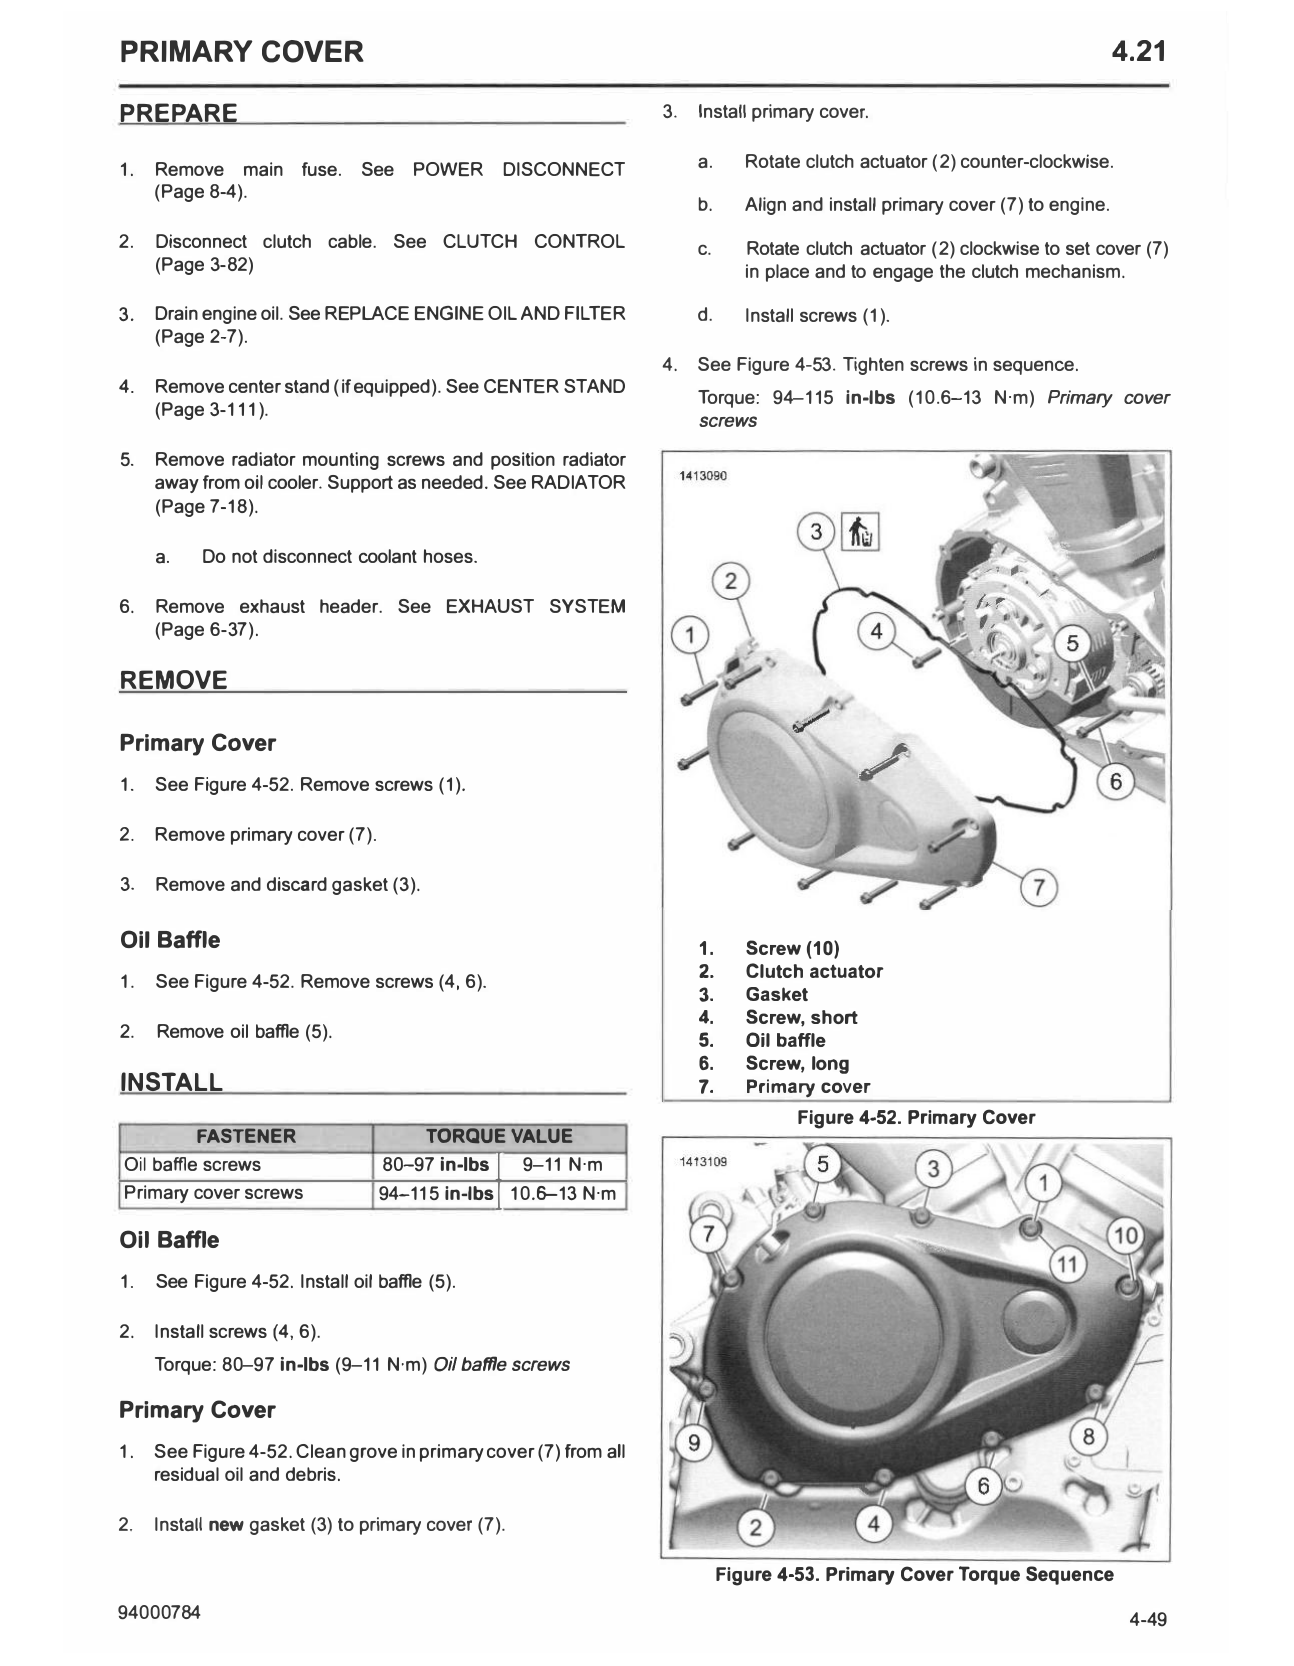
1. See Figure 4-52. Remove screws (1).
2. Remove primary cover (7).
3. Remove and discard gasket (3).
Oil Baffle 1. Screw(10)
2. Clutch actuator
1. See Figure 4-52. Remove screws (4, 6).
3. Gasket
4. Screw, short
2. Remove oil baffle (5).
5. Oil baffle
6. Screw, long
INSTALL 7. Primary cover
Figure 4-52. Primary Cover
FASTENER TORQUE VALUE
Oil baffle screws 80-97 in-lbs I
9-11 N·m
Primary cover screws 94-11 5 in-lbs I 10.�13 N·m
Oil Baffle
1. See Figure 4-52. Install oil baffle (5).
2. Install screws (4, 6).
Torque: 80-97 in-lbs (9-11 N·m) Oil baffle screws
Primary Cover
1. See Figure 4-52. Clean grove in primary cover (7) from all
residual oil and debris.
2. Install new gasket (3) to primary cover (7).
Figure 4-53. Primary Cover Torque Sequence
94000784 4-49
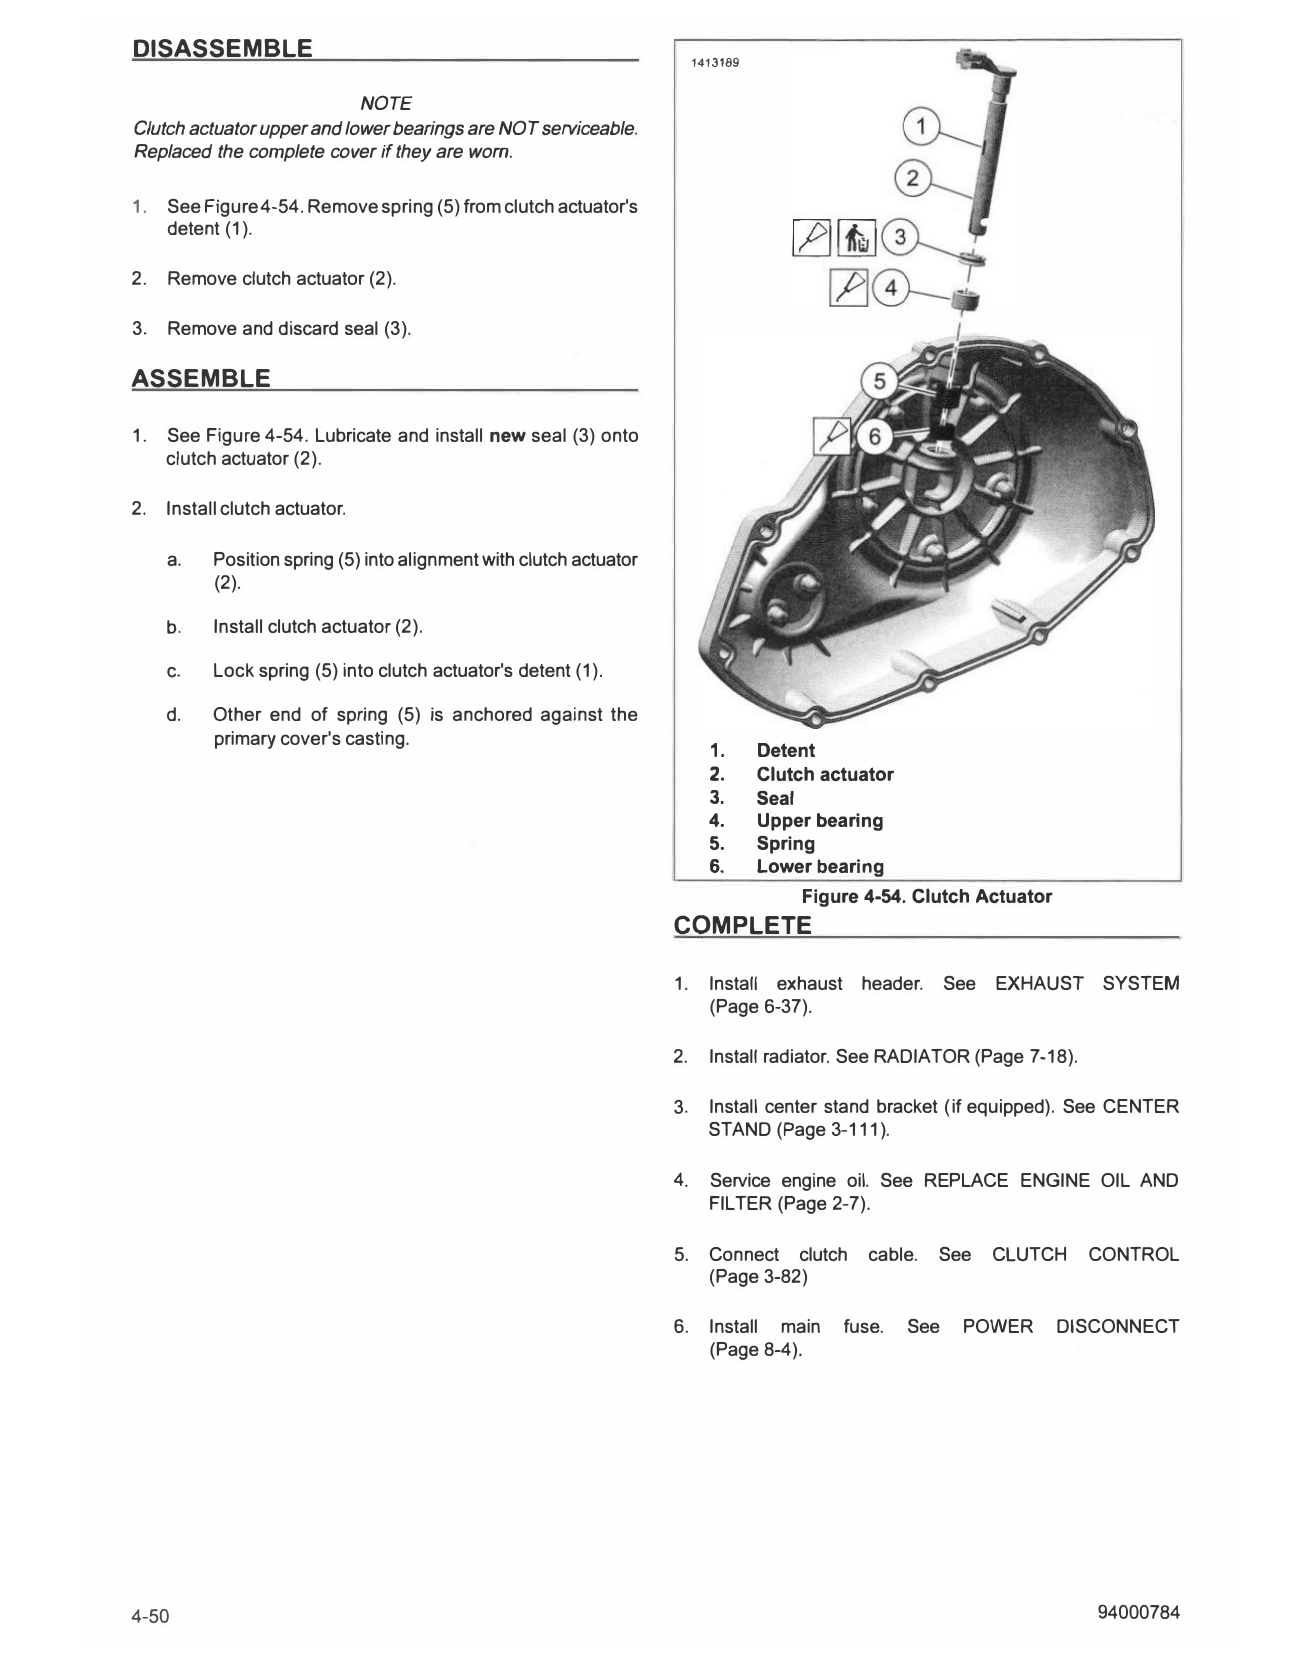
DISASSEMBLE 1413189
NOTE
Clutch actuator upper and lower bearings are NOT serviceable.
Replaced the complete cover if they are worn.
1. See Figure 4-54. Remove spring (5) from clutch actuator's
detent (1).
2. Remove clutch actuator (2).
3. Remove and discard seal (3).
ASSEMBLE
1. See Figure 4-54. Lubricate and install new seal (3) onto
clutch actuator (2).
2. Install clutch actuator.
a. Position spring (5) into alignment with clutch actuator
(2).
b. Install clutch actuator (2).
c. Lock spring (5) into clutch actuator's detent (1).
d. Other end of spring (5) is anchored against the
primary cover's casting.
1. Detent
2. Clutch actuator
3. Seal
4. Upper bearing
5. Spring
6. Lower bearing
Figure 4-54. Clutch Actuator
COMPLETE
1. Install exhaust header. See EXHAUST SYSTEM
(Page 6-37).
2. Install radiator. See RADIATOR (Page 7-18).
3. Install center stand bracket (if equipped). See CENTER
STAND (Page 3-111).
4. Service engine oil. See REPLACE ENGINE OIL AND
FILTER (Page 2-7).
5. Connect clutch cable. See CLUTCH CONTROL
(Page 3-82)
6. Install main fuse. See POWER DISCONNECT
(Page 8-4).
4-50 94000784