3.44 Jiffy Stand
Fragment manuala — str. 187–188
📋 Tekst do skopiowania (OCR/wyszukiwanie)
JIFFY STAND 3.44
P REPARE 2. Remove nut (4).
1. Set motorcycle upright. See Secure the Motorcycle for 3. Remove pivot pin (1).
Service (Page 2-2).
4. Remove jiffy stand (5).
2. Disconnect jiffy stand sensor, if equipped. See JIFFY
STAND SENSOR (JSS) (Page 8-57). 5. Remove bushings (3 and 7).
REMOVE 6. Inspect bushings for wear or damage, replace if necessary.
7. Remove jiffy stand bumper (6).
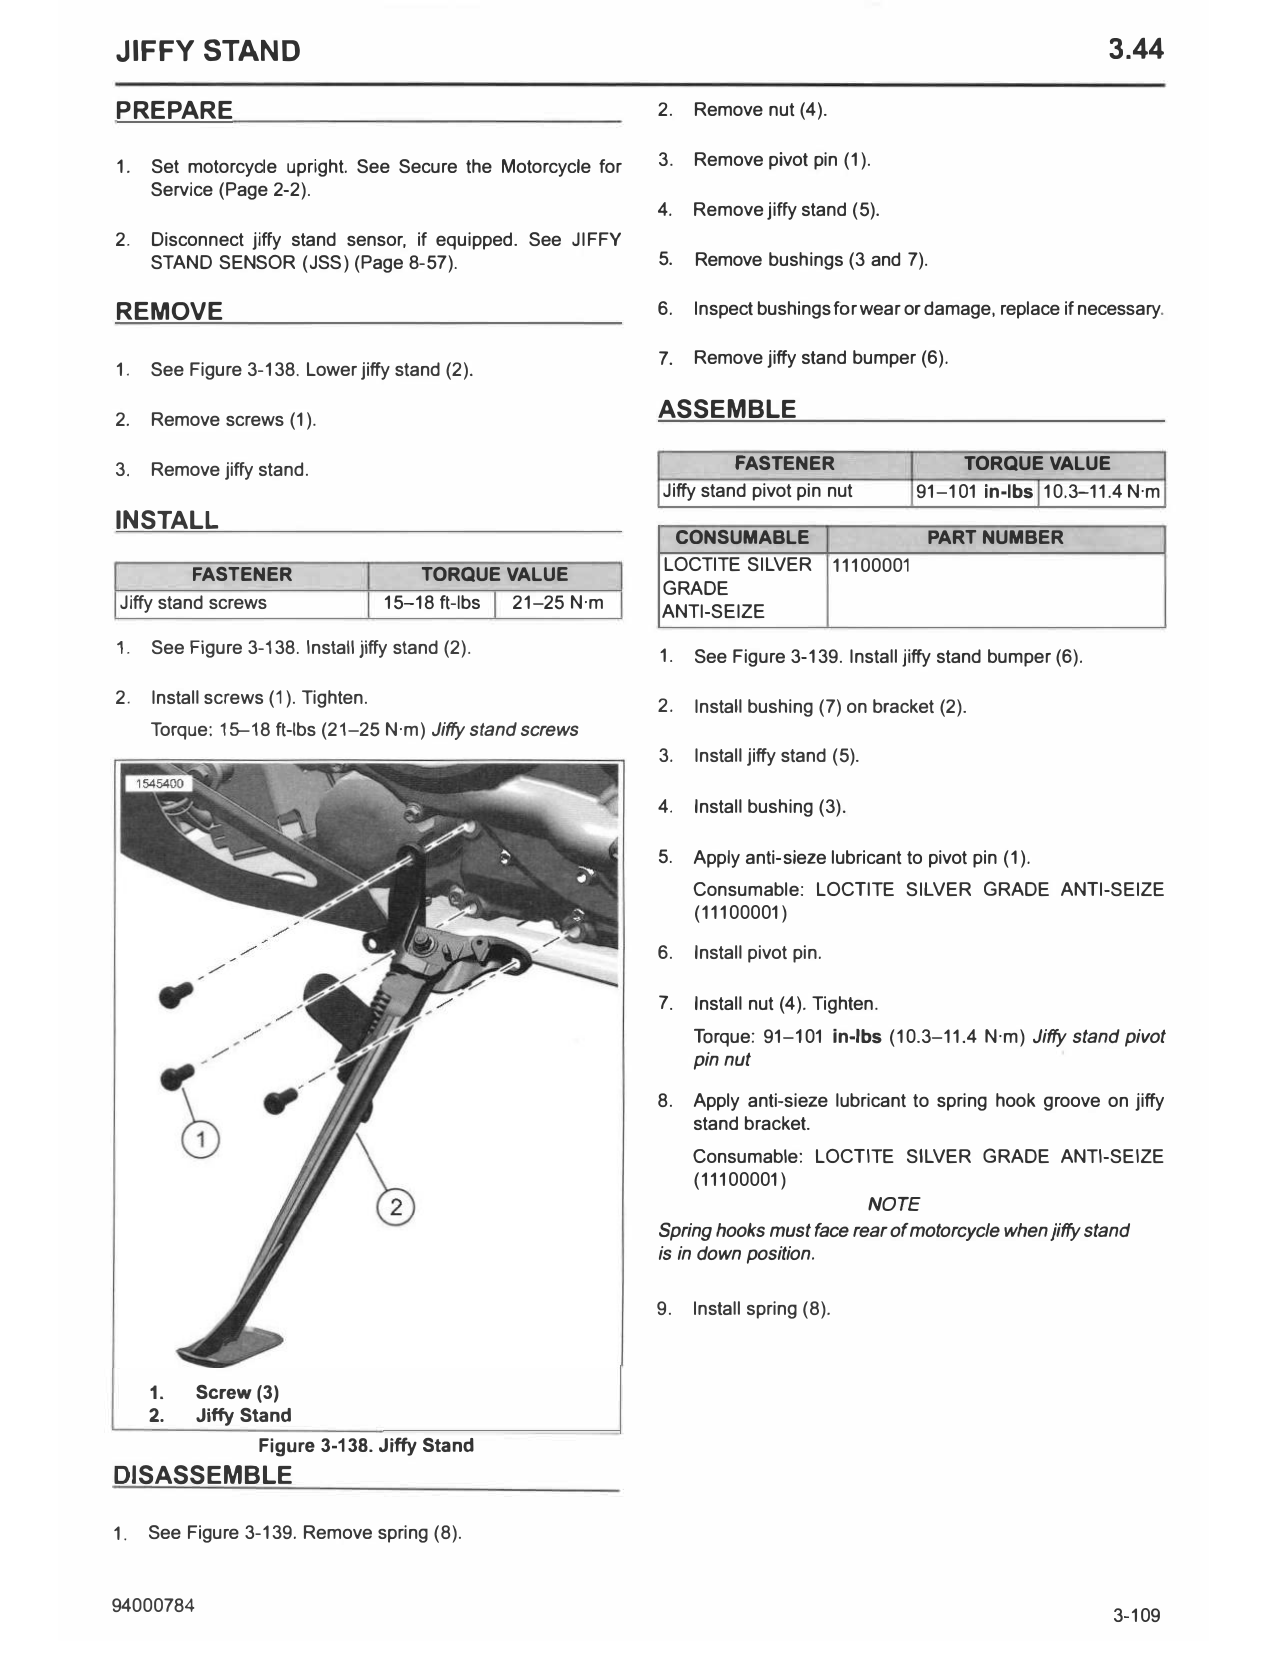
1. See Figure 3-138. Lower jiffy stand (2).
2. Remove screws (1). ASSEMBLE
3. Remove jiffy stand. FASTENER TORQUE VALUE
Jiffy stand pivot pin nut 91-101 in-lbs 10.3-11.4 N·m
INSTALL
CONSUMABLE PART NUMBER
LOCTITE SILVER 11100001
FASTENER TORQUE VALUE
GRADE
Jiffy stand screws 15-18 ft-lbs 21-25 N·m ANTI-SEIZE
1. See Figure 3-138. Install jiffy stand (2). 1. See Figure 3-139. Install jiffy stand bumper (6).
2. Install screws (1 ). Tighten. 2. Install bushing (7) on bracket (2).
Torque: 15--18 ft-lbs (21-25 N·m) Jiffy stand screws
3. Install jiffy stand (5).
4. Install bushing (3).
5. Apply anti-sieze lubricant to pivot pin (1).
Consumable: LOCTITE SILVER GRADE ANTI-SEIZE
(11100001)
6. Install pivot pin.
7. Install nut (4). Tighten.
Torque: 91-101 in-lbs (10.3-11.4 N·m) Jiffy stand pivot
pin nut
8. Apply anti-sieze lubricant to spring hook groove on jiffy
stand bracket.
Consumable: LOCTITE SILVER GRADE ANTI-SEIZE
(11100001)
NOTE
Spring hooks must face rear of motorcycle when jiffy stand
is in down position.
9. Install spring (8).
1. Screw (3)
2. Jiffy Stand
Figure 3-138. Jiffy Stand
DISASSEMBLE
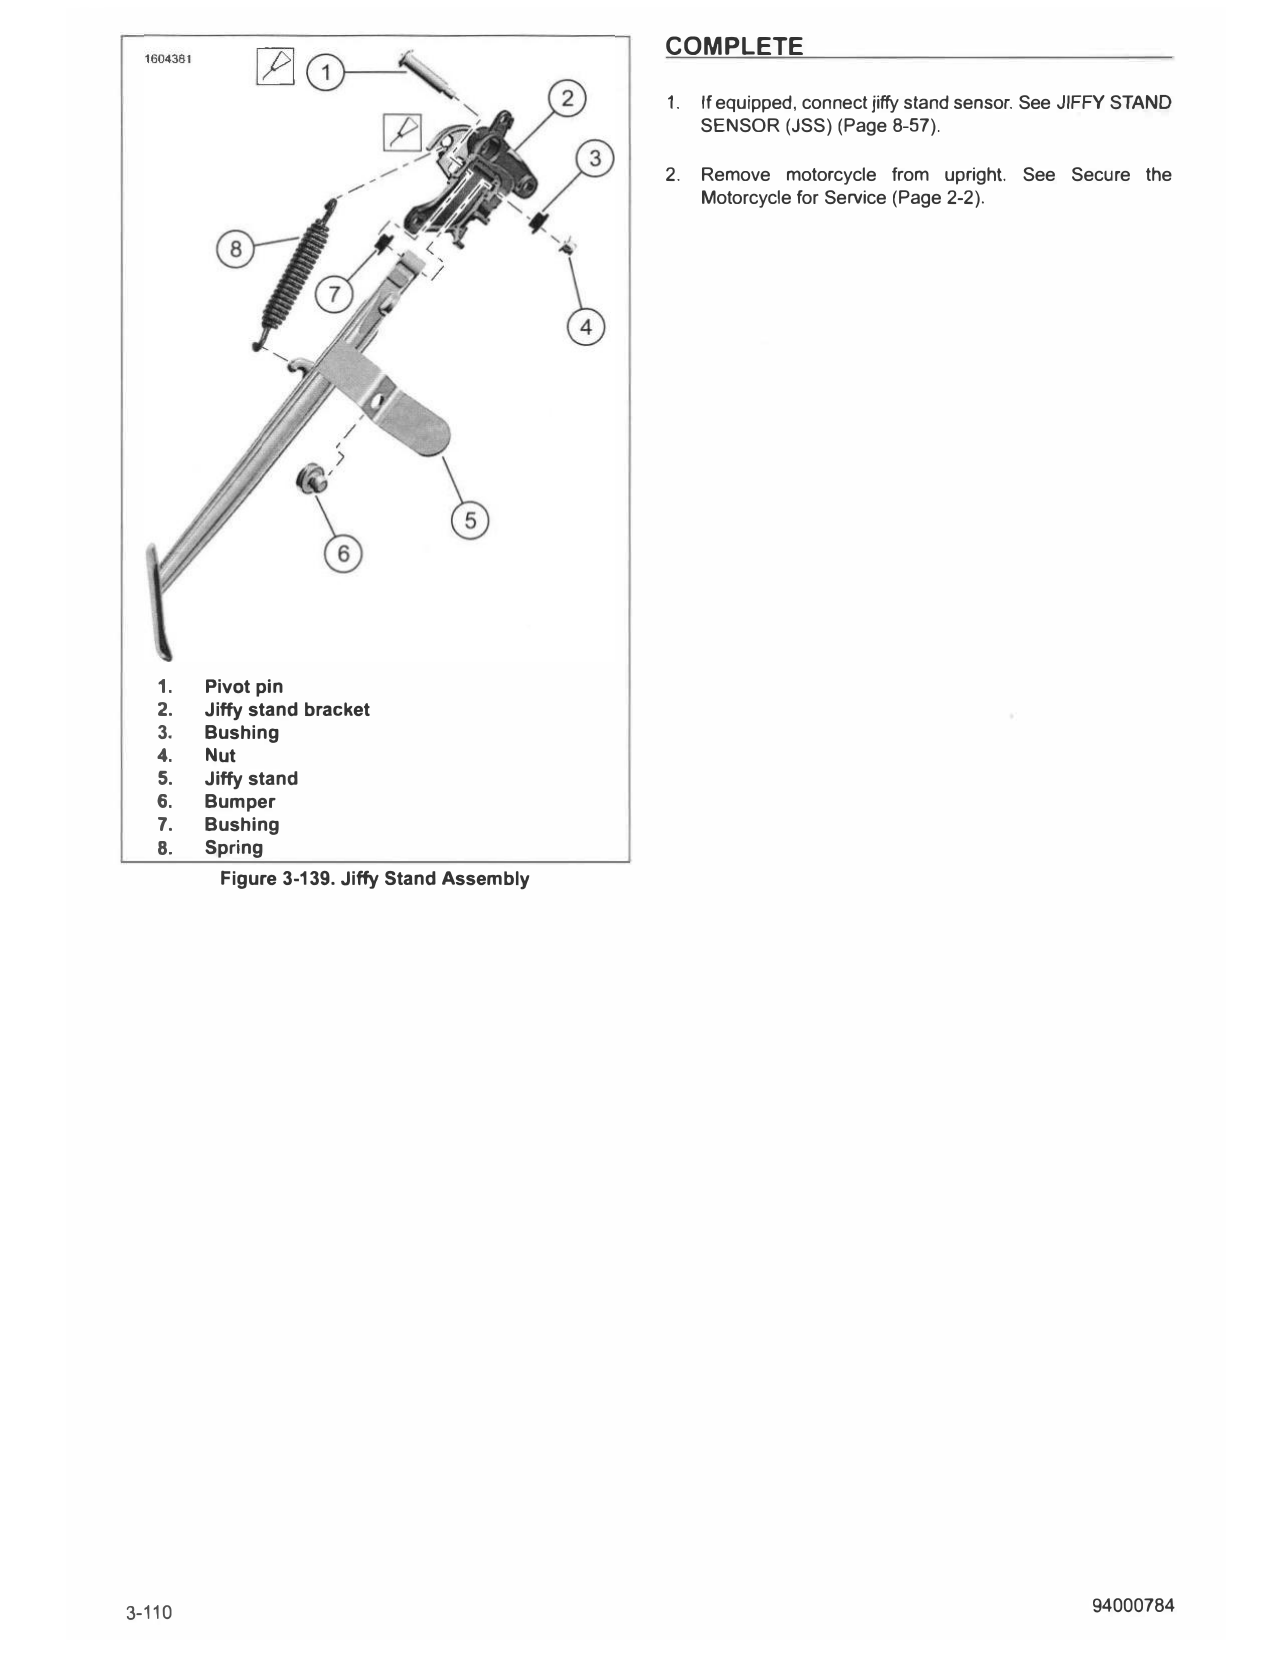
1. See Figure 3-139. Remove spring (8).
COMPLETE
1. If equipped, connect jiffy stand sensor. See JIFFY STAND
SENSOR (JSS) (Page 8-57).
2. Remove motorcycle from upright. See Secure the
Motorcycle for Service (Page 2-2).
1. Pivot pin
2. Jiffy stand bracket
3. Bushing
4. Nut
5. Jiffy stand
6. Bumper
7. Bushing
8. Spring
Figure 3-139. Jiffy Stand Assembly
3-110 94000784