3.33 Skid Plate
Fragment manuala — str. 170–171
📋 Tekst do skopiowania (OCR/wyszukiwanie)
SKID PLATE 3.33
REMOVE AND INSTALL
One Piece Skid Plate
Remove
1. See Figure 3-115. Remove screws (2).
2. Remove skid plate (1).
Install
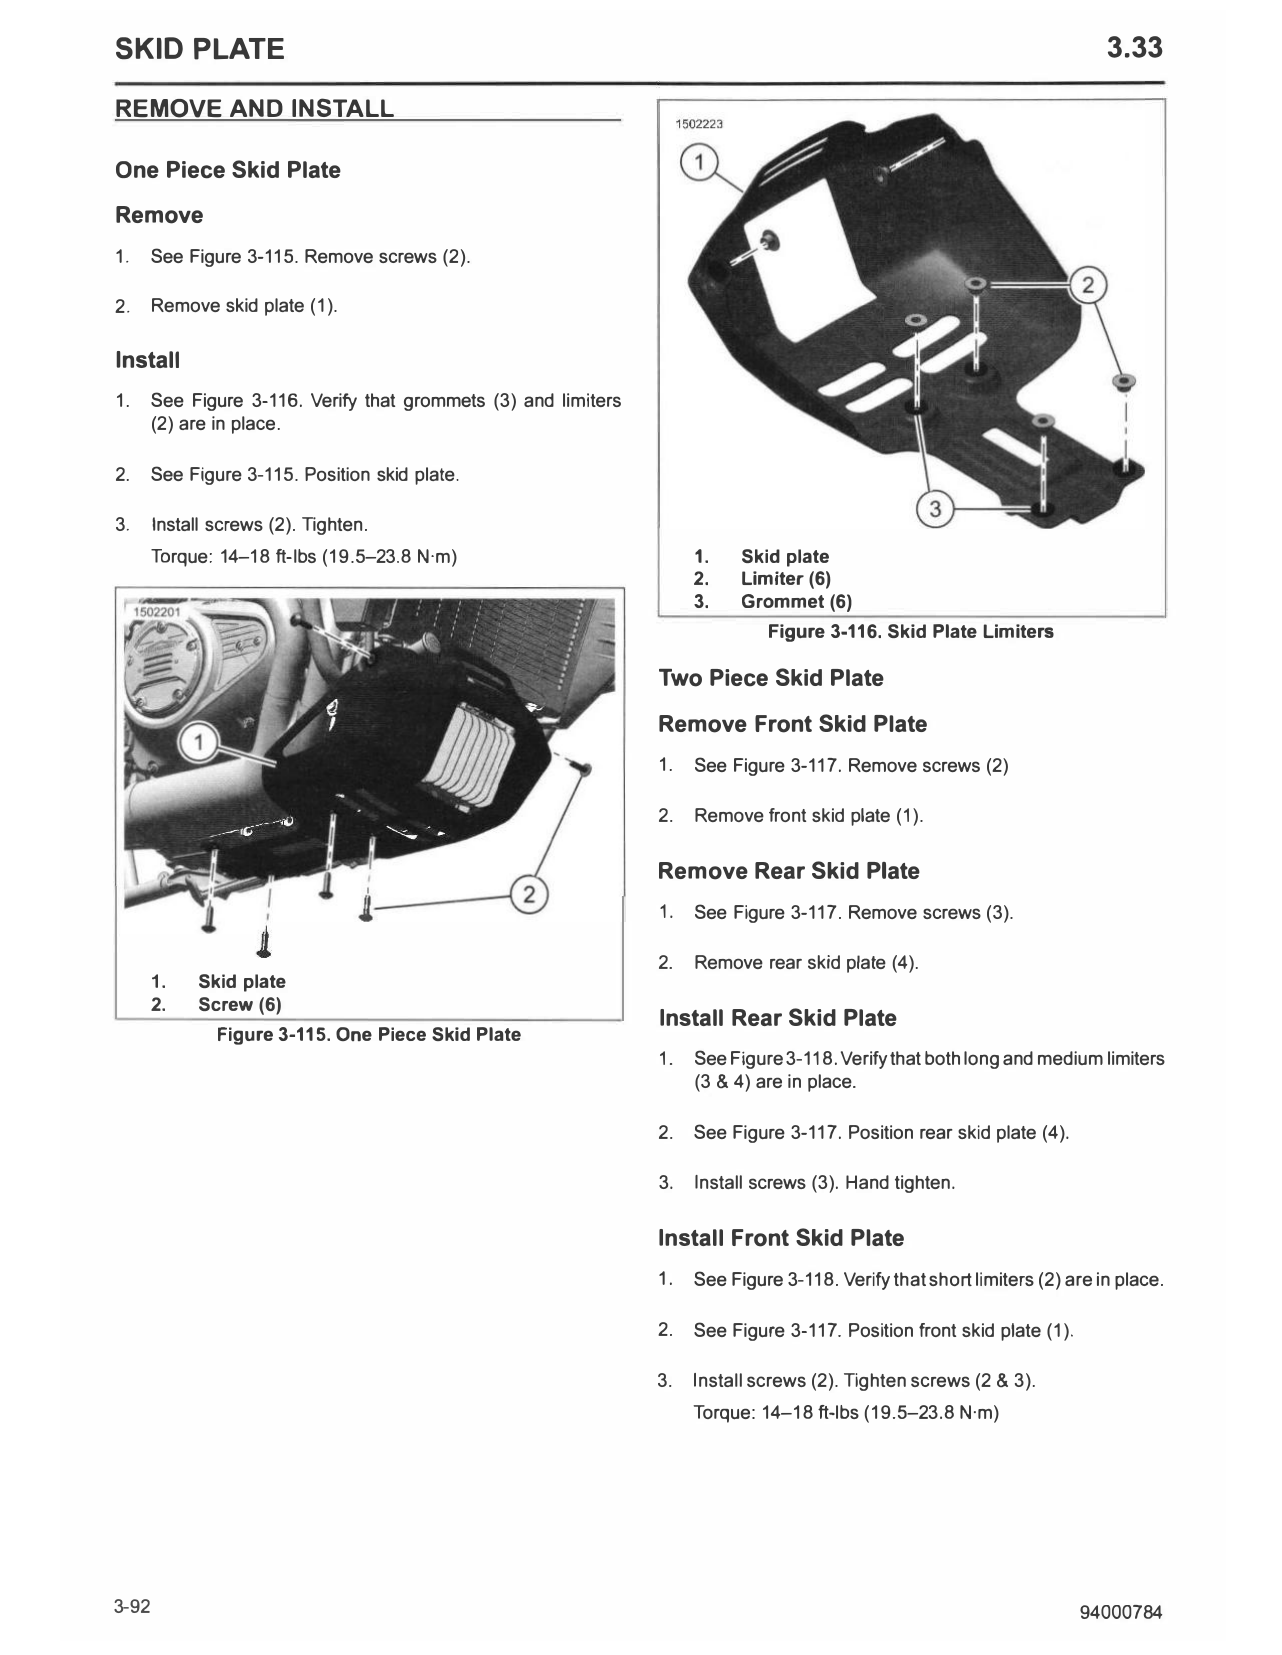
1. See Figure 3-116. Verify that grommets (3) and limiters
(2) are in place.
2. See Figure 3-115. Position skid plate.
3. Install screws (2). Tighten.
Torque: 14-18 ft-lbs (19.5-23.8 N·m) 1. Skid plate
2. Limiter (6)
3. Grommet (6)
Figure 3-116. Skid Plate Limiters
Two Piece Skid Plate
Remove Front Skid Plate
1. See Figure 3-117. Remove screws (2)
2. Remove front skid plate (1).
Remove Rear Skid Plate
1. See Figure 3-117. Remove screws (3).
2. Remove rear skid plate (4).
1. Skid plate
2. Screw (6)
Install Rear Skid Plate
Figure 3-115. One Piece Skid Plate
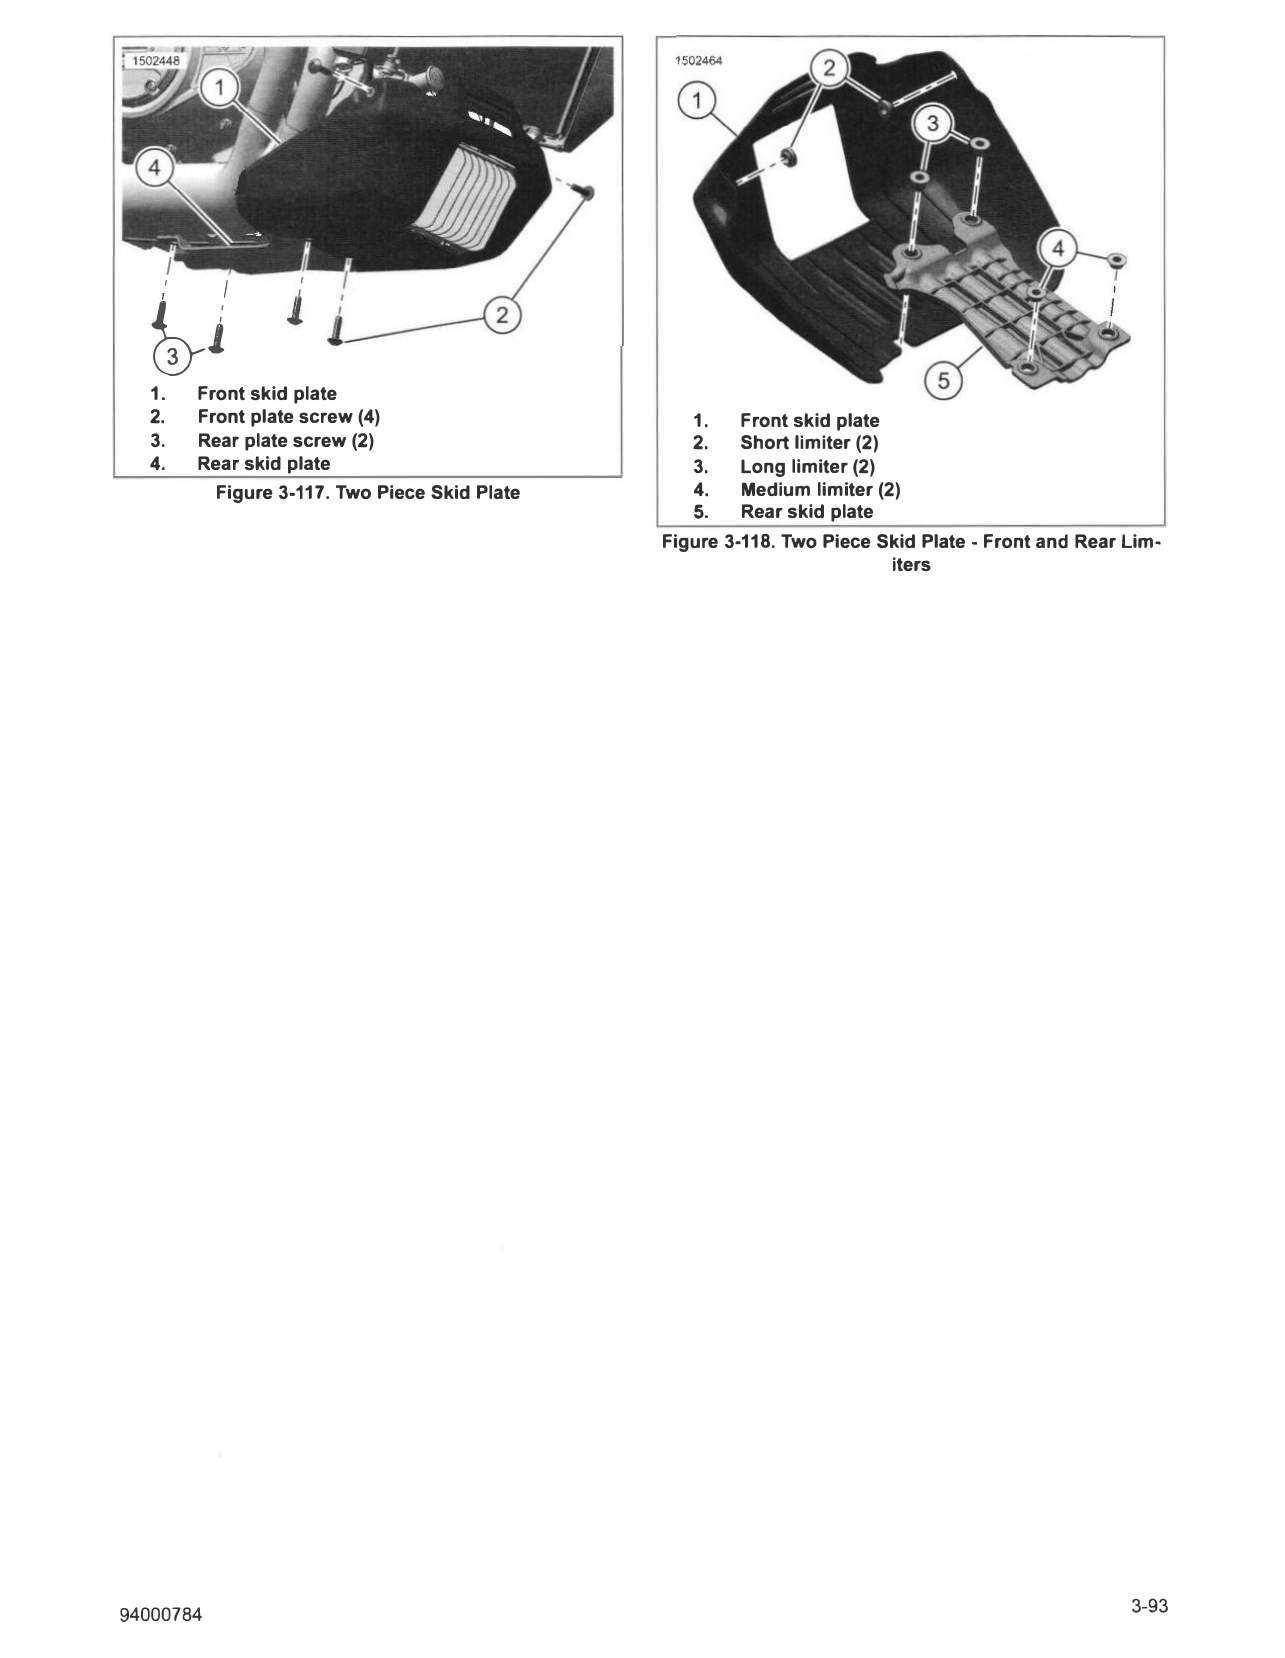
1. See Figure 3-118. Verify that both long and medium limiters
(3 & 4) are in place.
2. See Figure 3-117. Position rear skid plate (4).
3. Install screws (3). Hand tighten.
Install Front Skid Plate
1. See Figure 3-118. Verify that short limiters (2) are in place.
2. See Figure 3-117. Position front skid plate (1).
3. Install screws (2). Tighten screws (2 & 3).
Torque: 14-18 ft-lbs (19.5-23.8 N·m)
3-92 94000784
I
I
I
�j
1. Front skid plate
2. Front plate screw (4) 1. Front skid plate
3. Rear plate screw (2) 2. Short limiter (2)
4. Rear skid plate 3. Long limiter (2)
Figure 3-117. Two Piece Skid Plate 4. Medium limiter (2)
5. Rear skid plate
Figure 3-118. Two Piece Skid Plate - Front and Rear Lim
iters
94000784 3-93