7.6 Thermostat Housing
Fragment manuala — str. 371–372
📋 Tekst do skopiowania (OCR/wyszukiwanie)
THERMOSTAT HOUSING 7.6
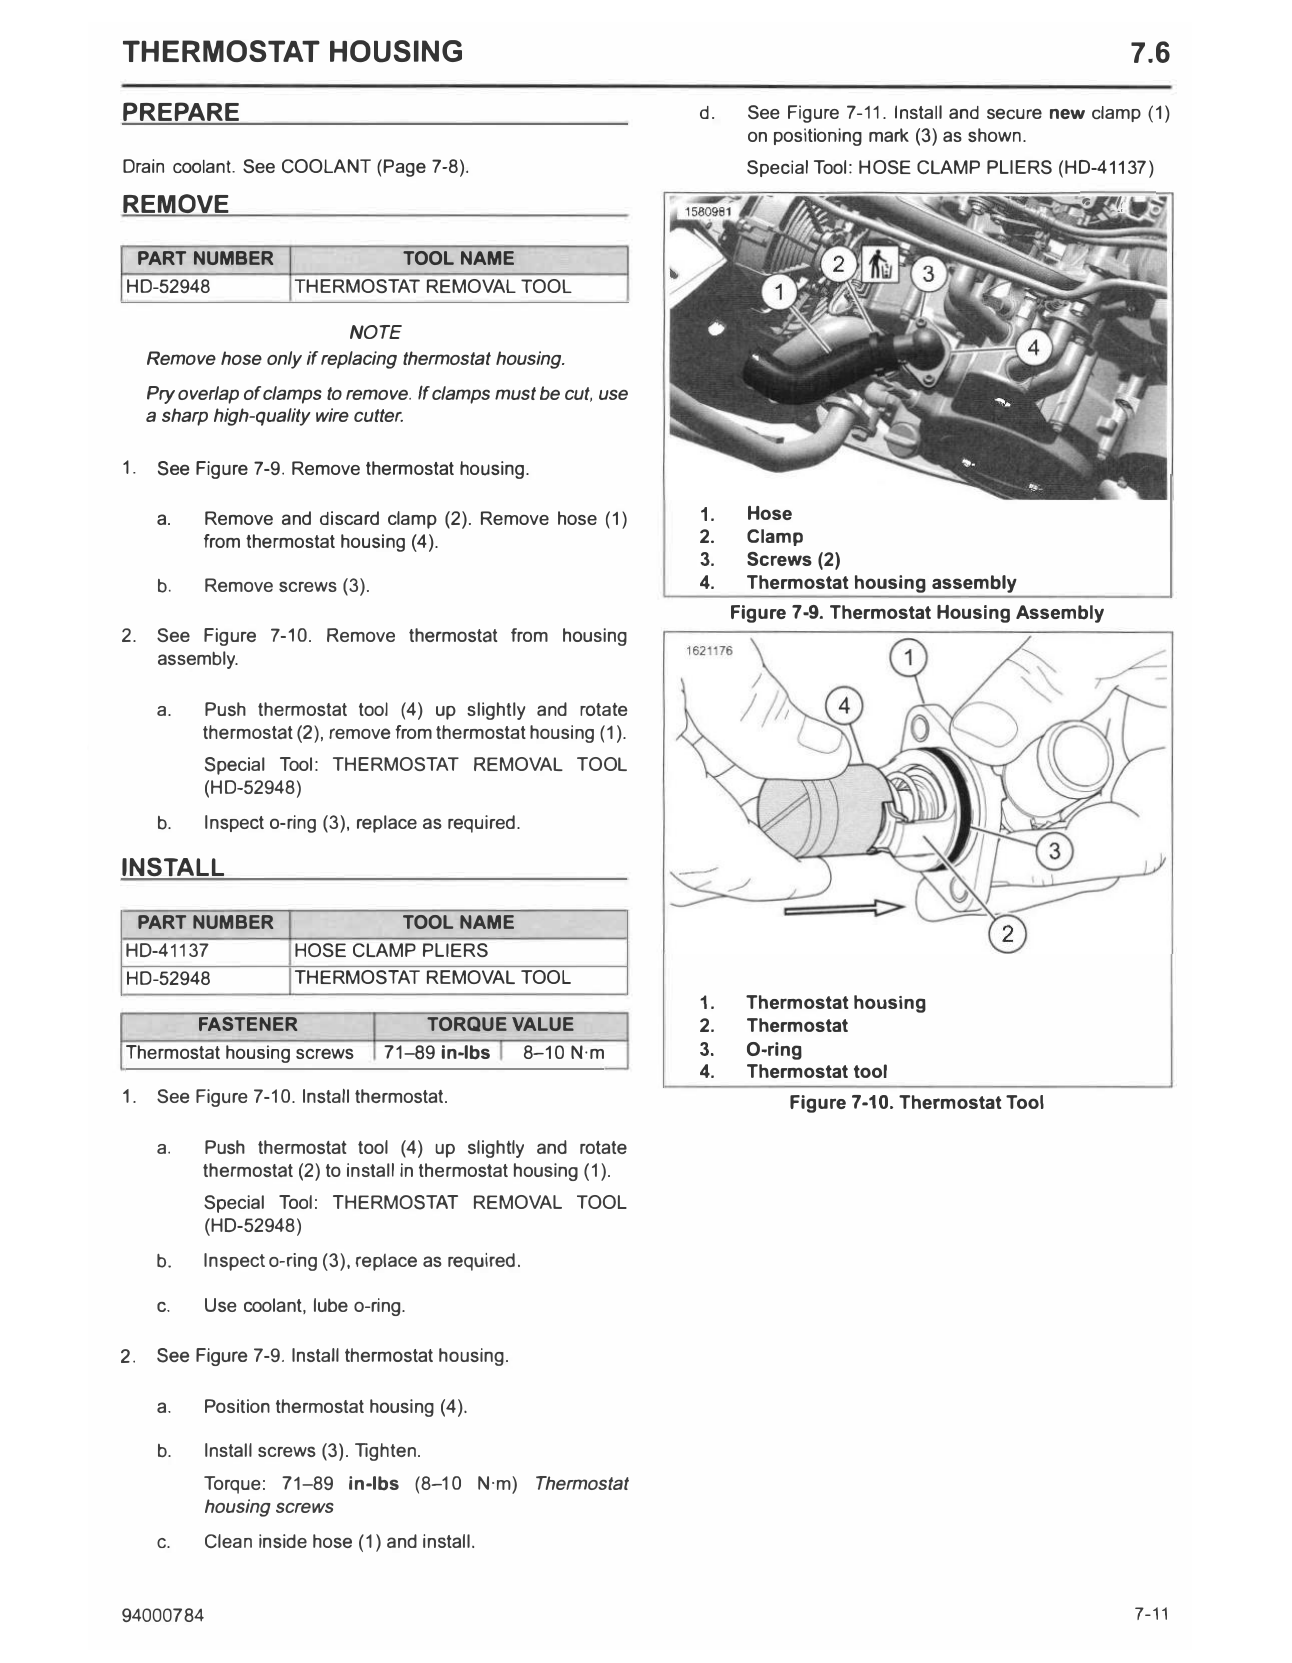
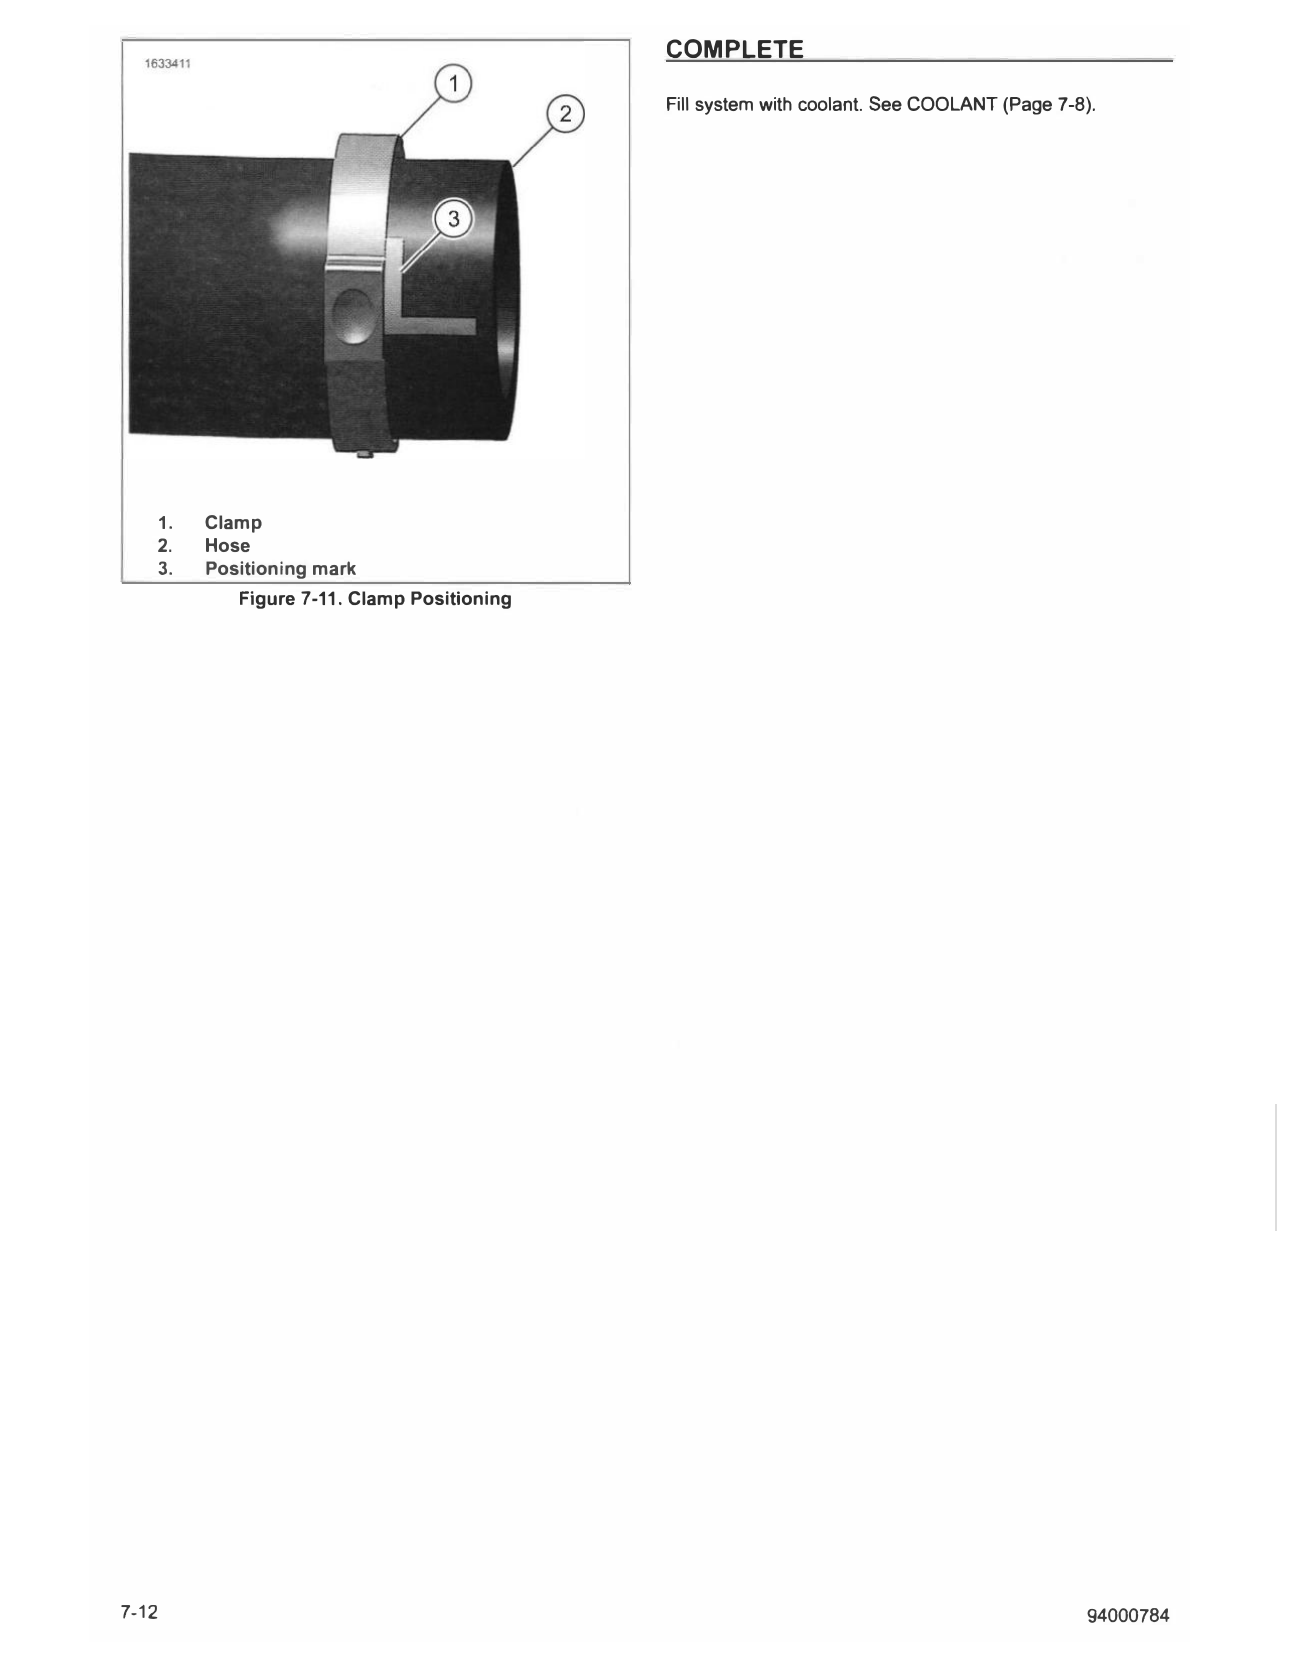
PREPARE d. See Figure 7-11 . Install and secure new clamp (1)
on positioning mark (3) as shown.
Drain coolant. See COOLANT (Page 7-8). Special Tool: HOSE CLAMP PLIERS (H0-41137)
REMOVE ,.. Ii
PART NUMBER TOOL NAME
HD-52948 THERMOSTAT REMOVAL TOOL
NOTE
Remove hose only if replacing thermostat housing.
Pry overlap of clamps to remove. If clamps must be cut, use
a sharp high-quality wire cutter.
1. See Figure 7-9. Remove thermostat housing.
a. Remove and discard clamp (2). Remove hose (1) 1. Hose
from thermostat housing (4 ). 2. Clamp
3. Screws (2)
b. Remove screws (3). 4. Thermostat housing assembly
Figure 7-9. Thermostat Housing Assembly
2. See Figure 7-10. Remove thermostat from housing
assembly.
a. Push thermostat tool ( 4 ) up slightly and rotate
thermostat (2), remove from thermostat housing (1 ).
Special Tool: THERMOSTAT REMOVAL TOOL
(HD-52948)
b. Inspect o-ring (3), replace as required.
INSTALL
PART NUMBER TOOL NAME
HD-41137 HOSE CLAMP PLIERS
HD-52948 THERMOSTAT REMOVAL TOOL
1. Thermostat housing
FASTENER TORQUE VALUE 2. Thermostat
T hermostat housing screws 7 1-89 in-lbs 8-10 N·m 3. O-ring
4. Thermostat tool
1. See Figure 7-10. Install thermostat. Figure 7-10. Thermostat Tool
a. Push thermostat tool (4) up slightly and rotate
thermostat (2) to install in thermostat housing ( 1 ).
Special Tool: THERMOSTAT REMOVAL TOOL
(HD-52948)
b. Inspect o-ring (3), replace as required.
c. Use coolant, lube o-ring.
2. See Figure 7-9. Install thermostat housing.
a. Position thermostat housing (4).
b. Install screws (3). Tighten.
Torque: 71-8 9 in-lbs (8-10 N·m) Thermostat
housing screws
c. Clean inside hose (1 ) and install.
9400078 4 7-11
COMPLETE
Fill system with coolant. See COOLANT (Page 7-8).
1. Clamp
2. Hose
3. Positioning mark
Figure 7-11. Clamp Positioning
7-12 94000784