6.11 Fuel Tank
Fragment manuala — str. 327–328
📋 Tekst do skopiowania (OCR/wyszukiwanie)
FUEL TANK 6.11
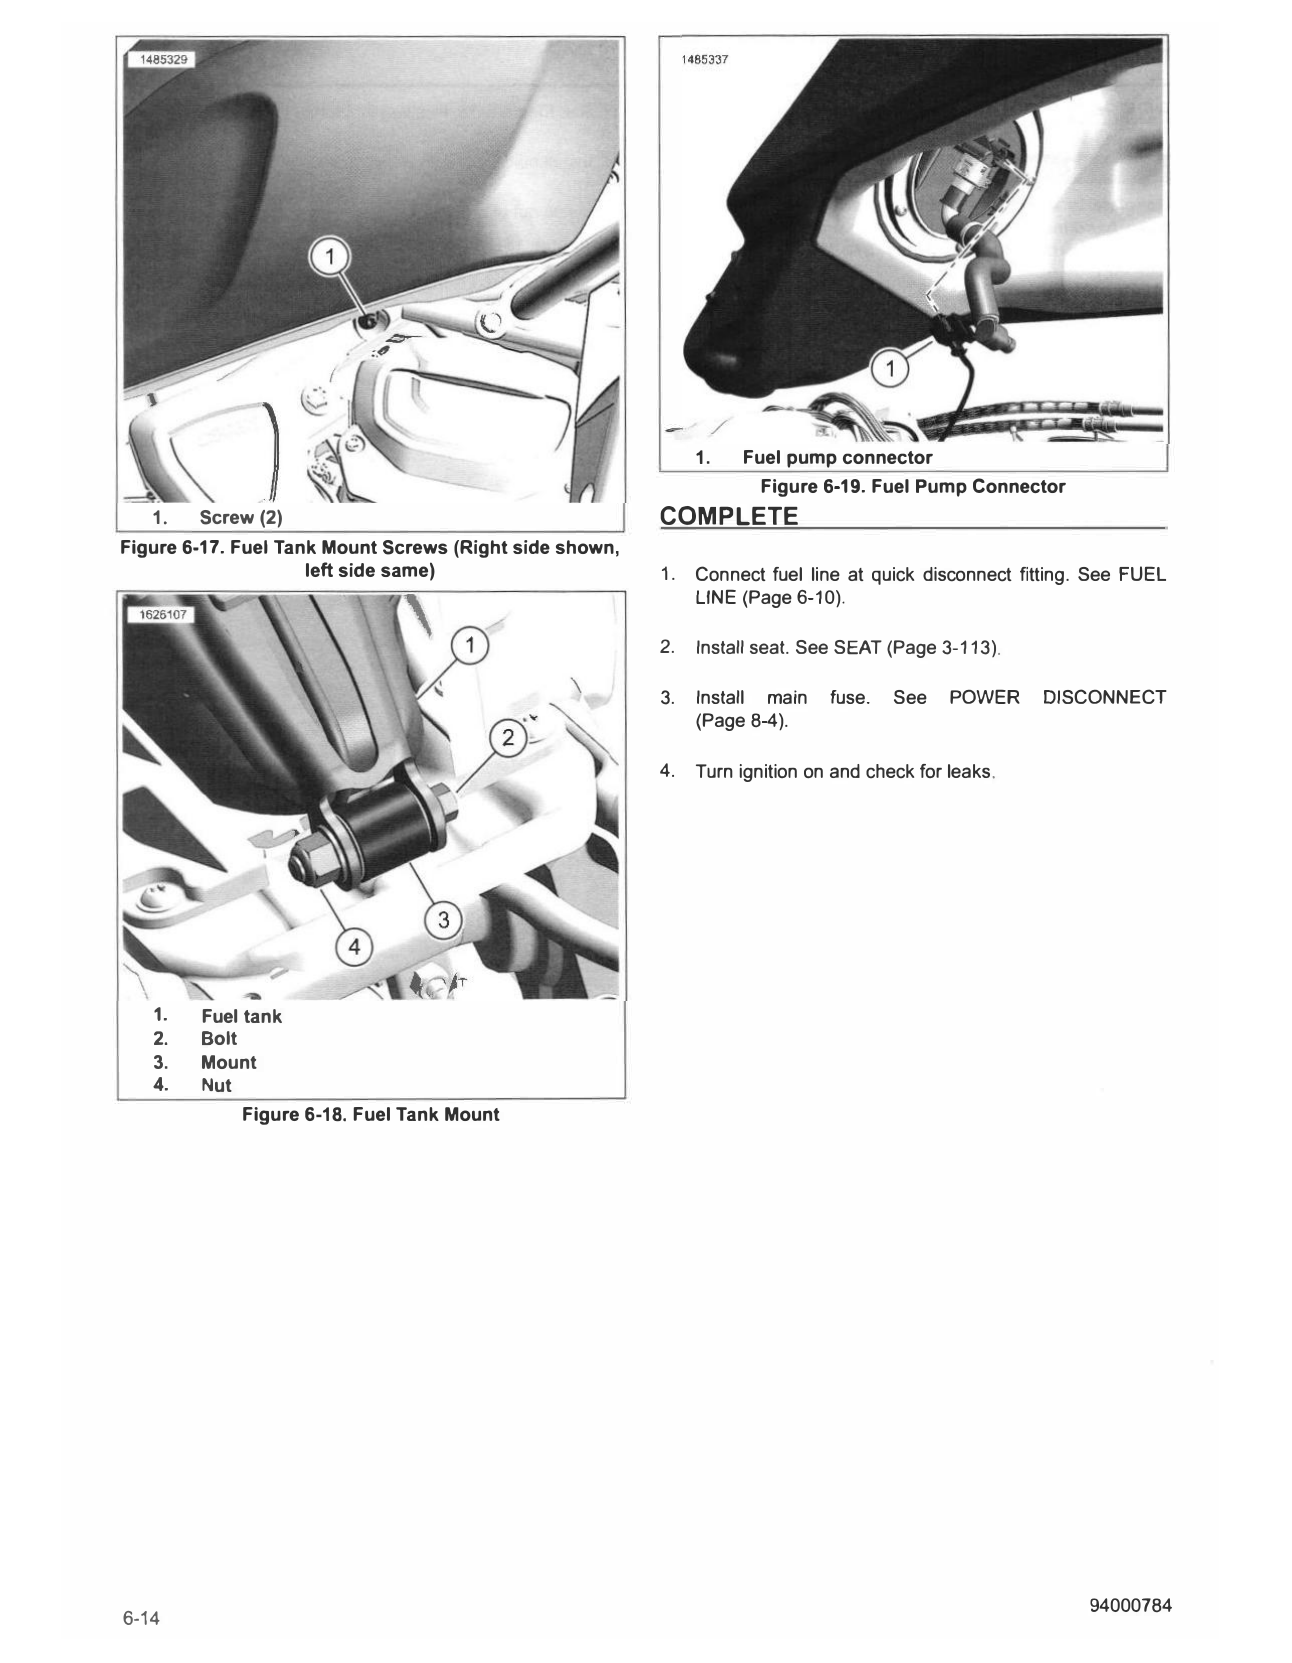
PREPARE 4. See Figure 6-18. Position fuel tank (1) on mount (3).
A.WARNING 5. Install bolt (2).
Gasoline is extremely flammable and highly explosive. 6. Install nut (4). Tighten.
Keep gasoline away from ignition sources which could
result in death or serious injury. See the Safety chapter. Torque: 18-21 ft-lbs (25-29 N·m) Fuel tank mounting nut
(00635c)
7. See Figure 6-17. Install Screws (1). Tighten.
Torque: 89-102 in-lbs (10-11.5 N·m) Fuel tank mounting
1. Remove main fuse. See POWER DISCONNECT screws
(Page 8-4).
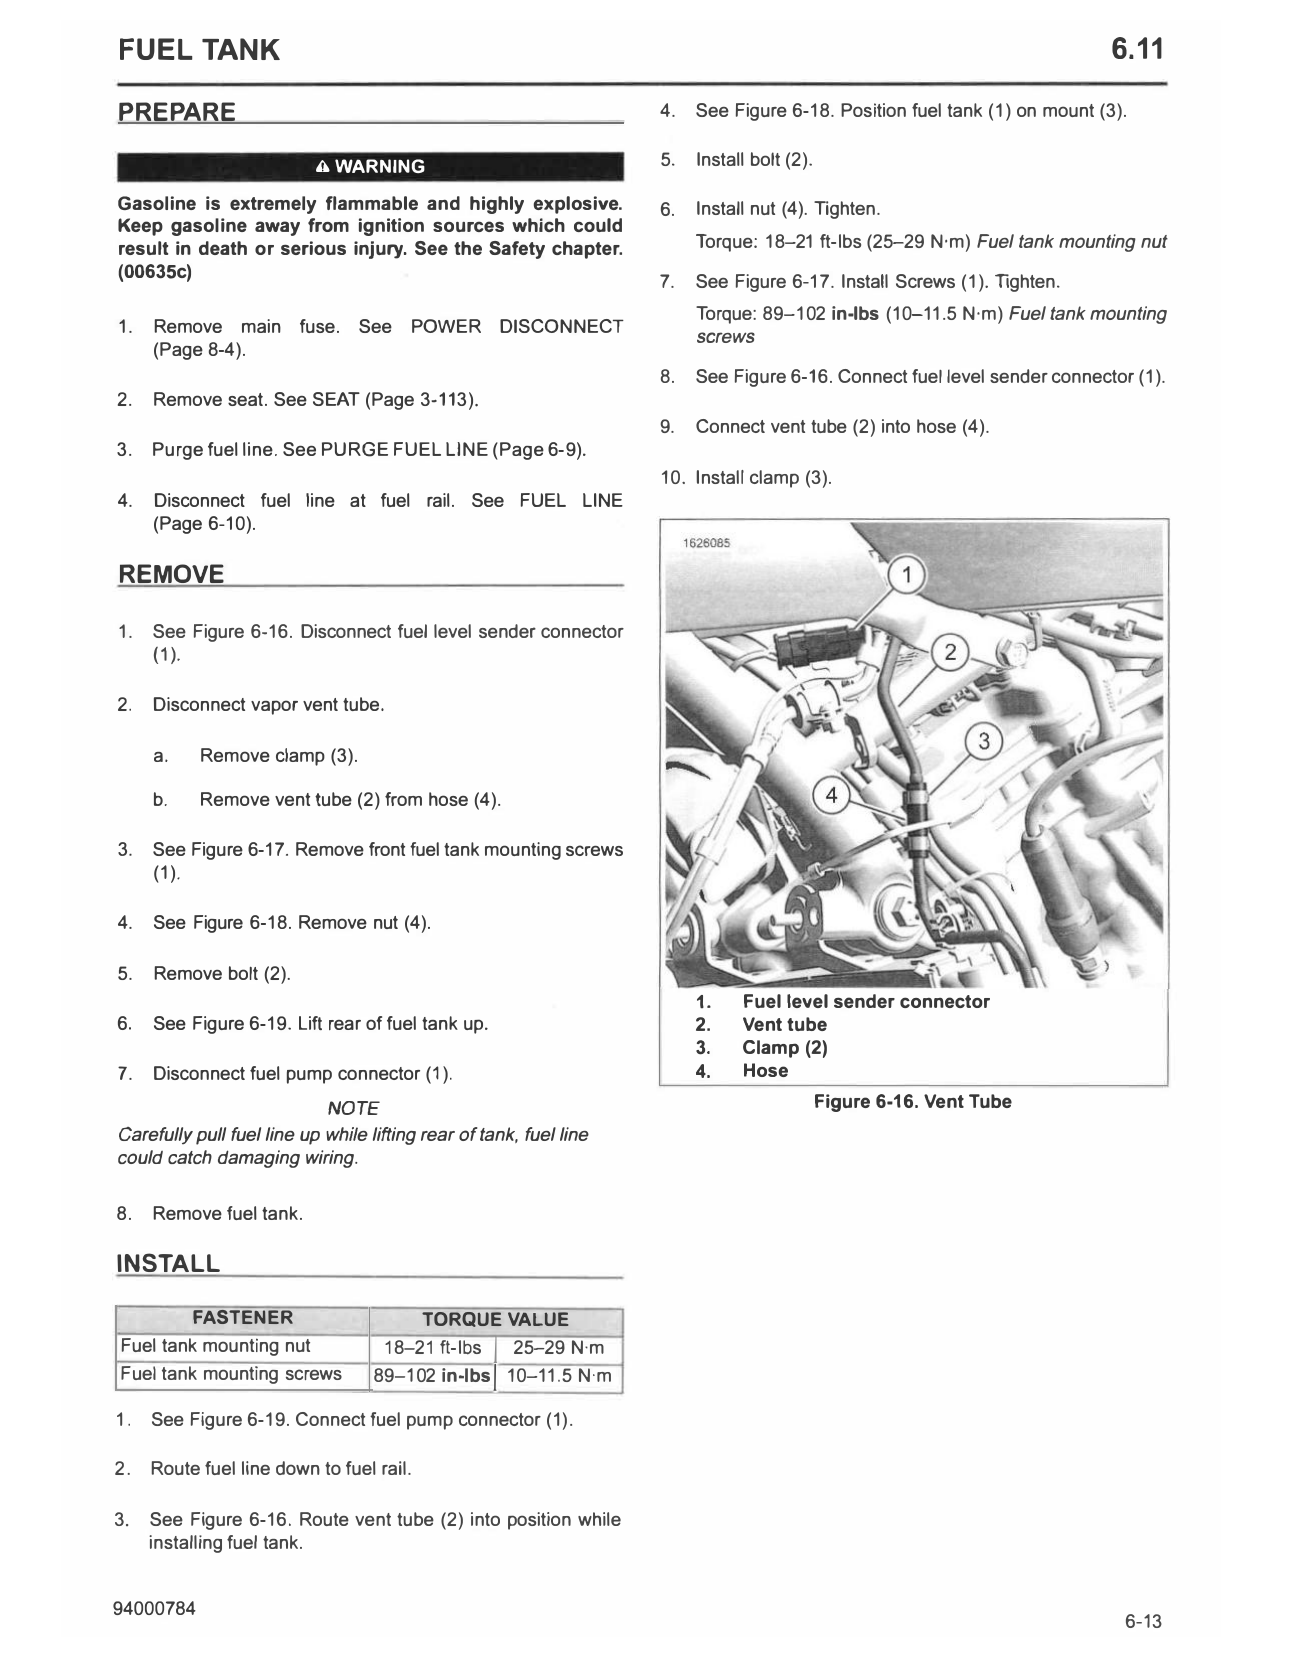
8. See Figure 6-16. Connect fuel level sender connector (1).
2. Remove seat. See SEAT (Page 3-113).
9. Connect vent tube (2) into hose (4).
3. Purge fuel line. See PURGE FUEL LINE (Page 6-9).
10. Install clamp (3).
4. Disconnect fuel line at fuel rail. See FUEL LINE
(Page 6-10).
REMOVE
1. See Figure 6-16. Disconnect fuel level sender connector
(1 ).
2. Disconnect vapor vent tube.
a. Remove clamp (3).
b. Remove vent tube (2) from hose (4).
3. See Figure 6-17. Remove front fuel tank mounting screws
(1).
4. See Figure 6-18. Remove nut (4).
5. Remove bolt (2).
1. Fuel level sender connector
6. See Figure 6-19. Lift rear of fuel tank up. 2. Vent tube
3. Clamp (2)
7. Disconnect fuel pump connector (1 ). 4. Hose
NOTE Figure 6-16. Vent Tube
Carefully pull fuel line up while lifting rear of tank, fuel line
could catch damaging wiring.
8. Remove fuel tank.
INSTALL
FASTENER TORQUE VALUE
Fuel tank mounting nut 18-21 ft-lbs I 25--29 N·m
Fuel tank mounting screws 89-102 in-lbs! 10-11.5 N·m
1. See Figure 6-19. Connect fuel pump connector (1).
2. Route fuel line down to fuel rail.
3. See Figure 6-16. Route vent tube (2) into position while
installing fuel tank.
9 4000784
1. Fuel pump connector
Figure 6-19. Fuel Pump Connector
1. Screw (2) COMPLETE
Figure 6-17. Fuel Tank Mount Screws (Right side shown,
left side same) 1. Connect fuel line at quick disconnect fitting. See FUEL
LINE (Page 6-10).
2. Install seat. See SEAT (Page 3-113).
3. Install main fuse. See POWER DISCONNECT
(Page 8-4).
4. Turn ignition on and check for leaks.
1. Fuel tank
2. Bolt
3. Mount
4. Nut
Figure 6-18. Fuel Tank Mount