2.5 Replace Engine Oil And Filter
Fragment manuala — str. 37–38
📋 Tekst do skopiowania (OCR/wyszukiwanie)
REPLACE ENGINE OIL AND FILTER 2.5
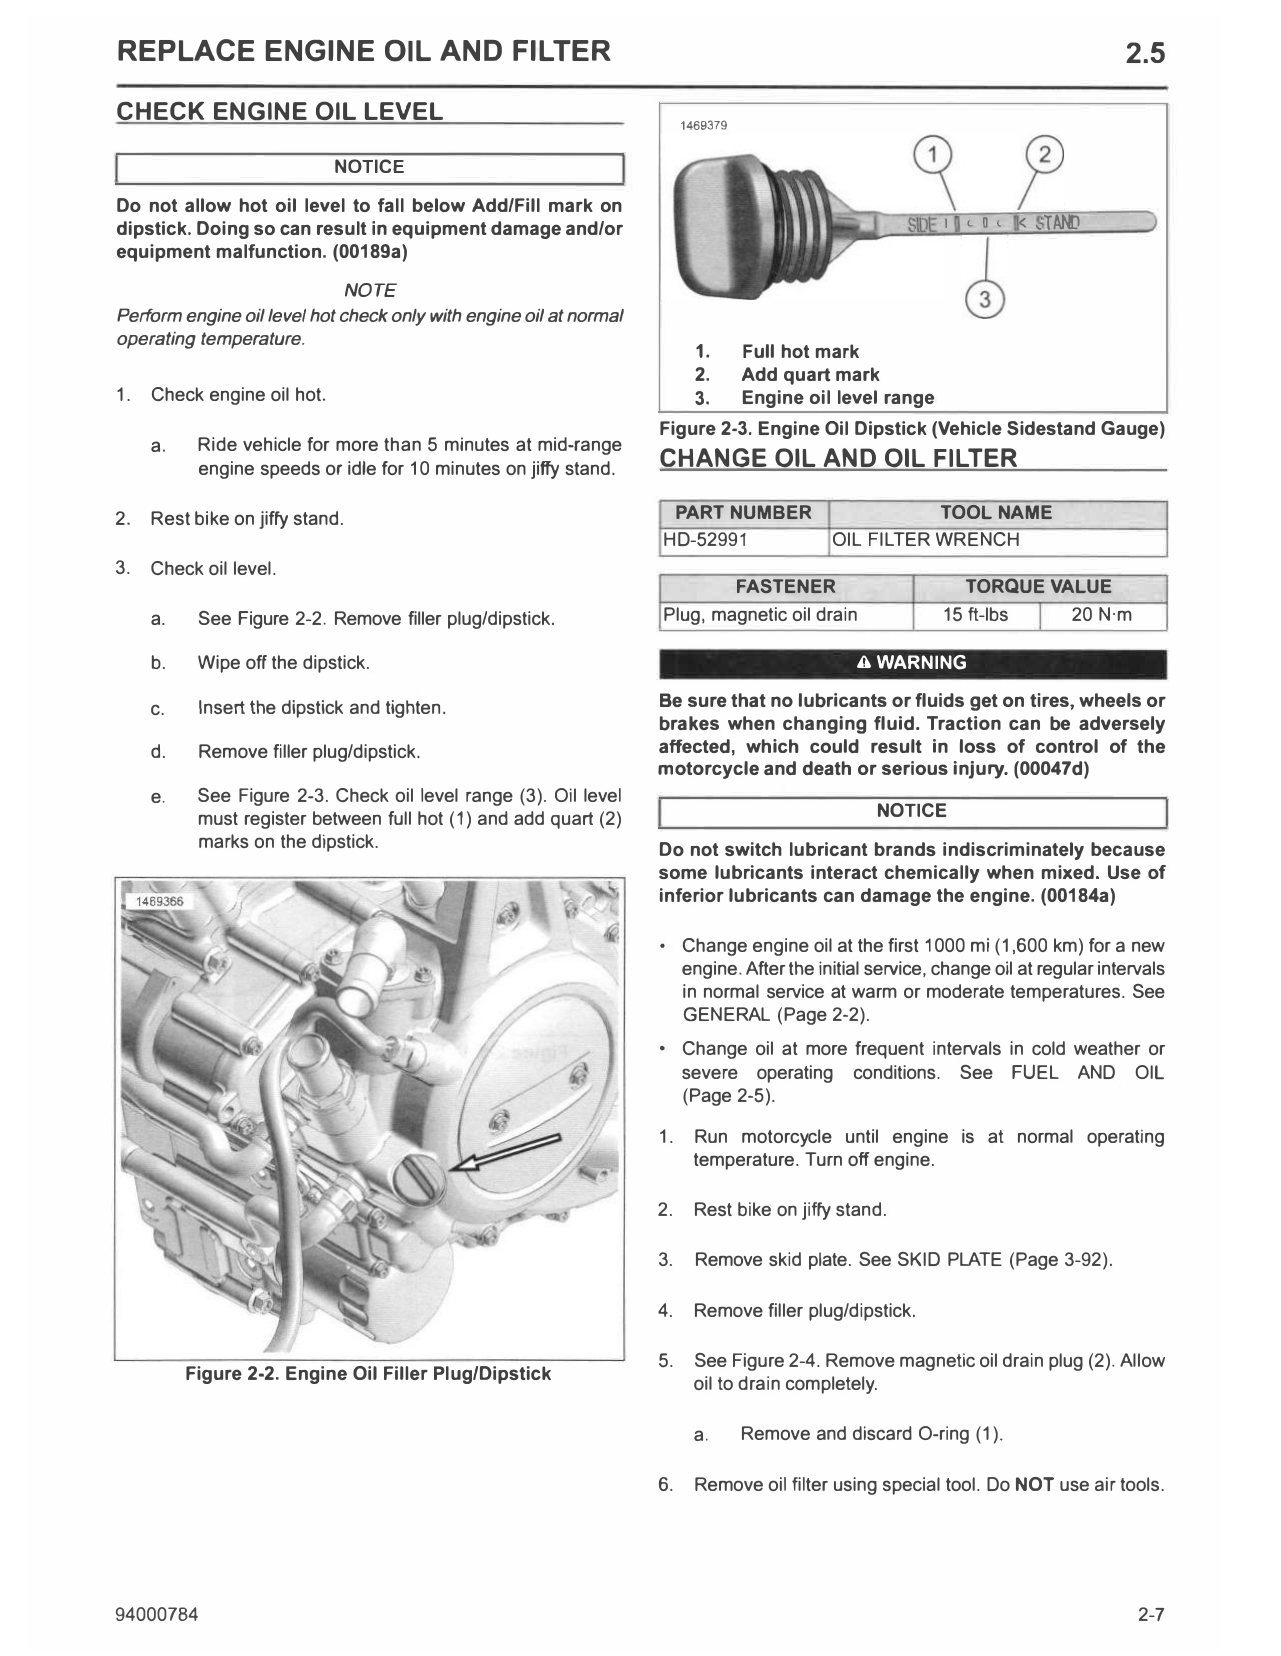
CHECK ENGINE OIL LEVEL 1469379
NOTICE
Do not allow hot oil level to fall below Add/Fill mark on
dipstick. Doing so can result in equipment damage and/or I c O , < , TAND
equipment malfunction. (00189a)
NOTE
Perform engine oil level hot check only with engine oil at normal
operating temperature.
1. Full hot mark
2. Add quart mark
1. Check engine oil hot. 3. Engine oil level range
Figure 2-3. Engine Oil Dipstick (Vehicle Sidestand Gauge)
a. Ride vehicle for more than 5 minutes at mid-range
engine speeds or idle for 10 minutes on jiffy stand. CHANGE OIL AND OIL FILTER
2. Rest bike on jiffy stand. PART NUMBER TOOL NAME
HD-52991 OIL FILTER WRENCH
3. Check oil level.
FASTENER TORQUE VALUE
a. See Figure 2-2. Remove filler plug/dipstick. Plug, magnetic oil drain 15 ft-lbs 20 N·m
b. Wipe off the dipstick. A WARNING
c. Insert the dipstick and tighten. Be sure that no lubricants or fluids get on tires, wheels or
brakes when changing fluid. Traction can be adversely
d. Remove filler plug/dipstick. affected, which could result in loss of control of the
motorcycle and death or serious injury. (00047d)
e. See Figure 2-3. Check oil level range (3). Oil level
must register between full hot (1) and add quart (2) NOTICE
marks on the dipstick. Do not switch lubricant brands indiscriminately because
some lubricants interact chemically when mixed. Use of
inferior lubricants can damage the engine. (00184a)
• Change engine oil at the first 1000 mi (1,600 km) for a new
engine. After the initial service, change oil at regular intervals
in normal service at warm or moderate temperatures. See
GENERAL (Page 2-2).
• Change oil at more frequent intervals in cold weather or
severe operating conditions. See FUEL AND OIL
(Page 2-5).
1. Run motorcycle until engine is at normal operating
temperature. Turn off engine.
2. Rest bike on jiffy stand.
3. Remove skid plate. See SKID PLATE (Page 3-92).
4. Remove filler plug/dipstick.
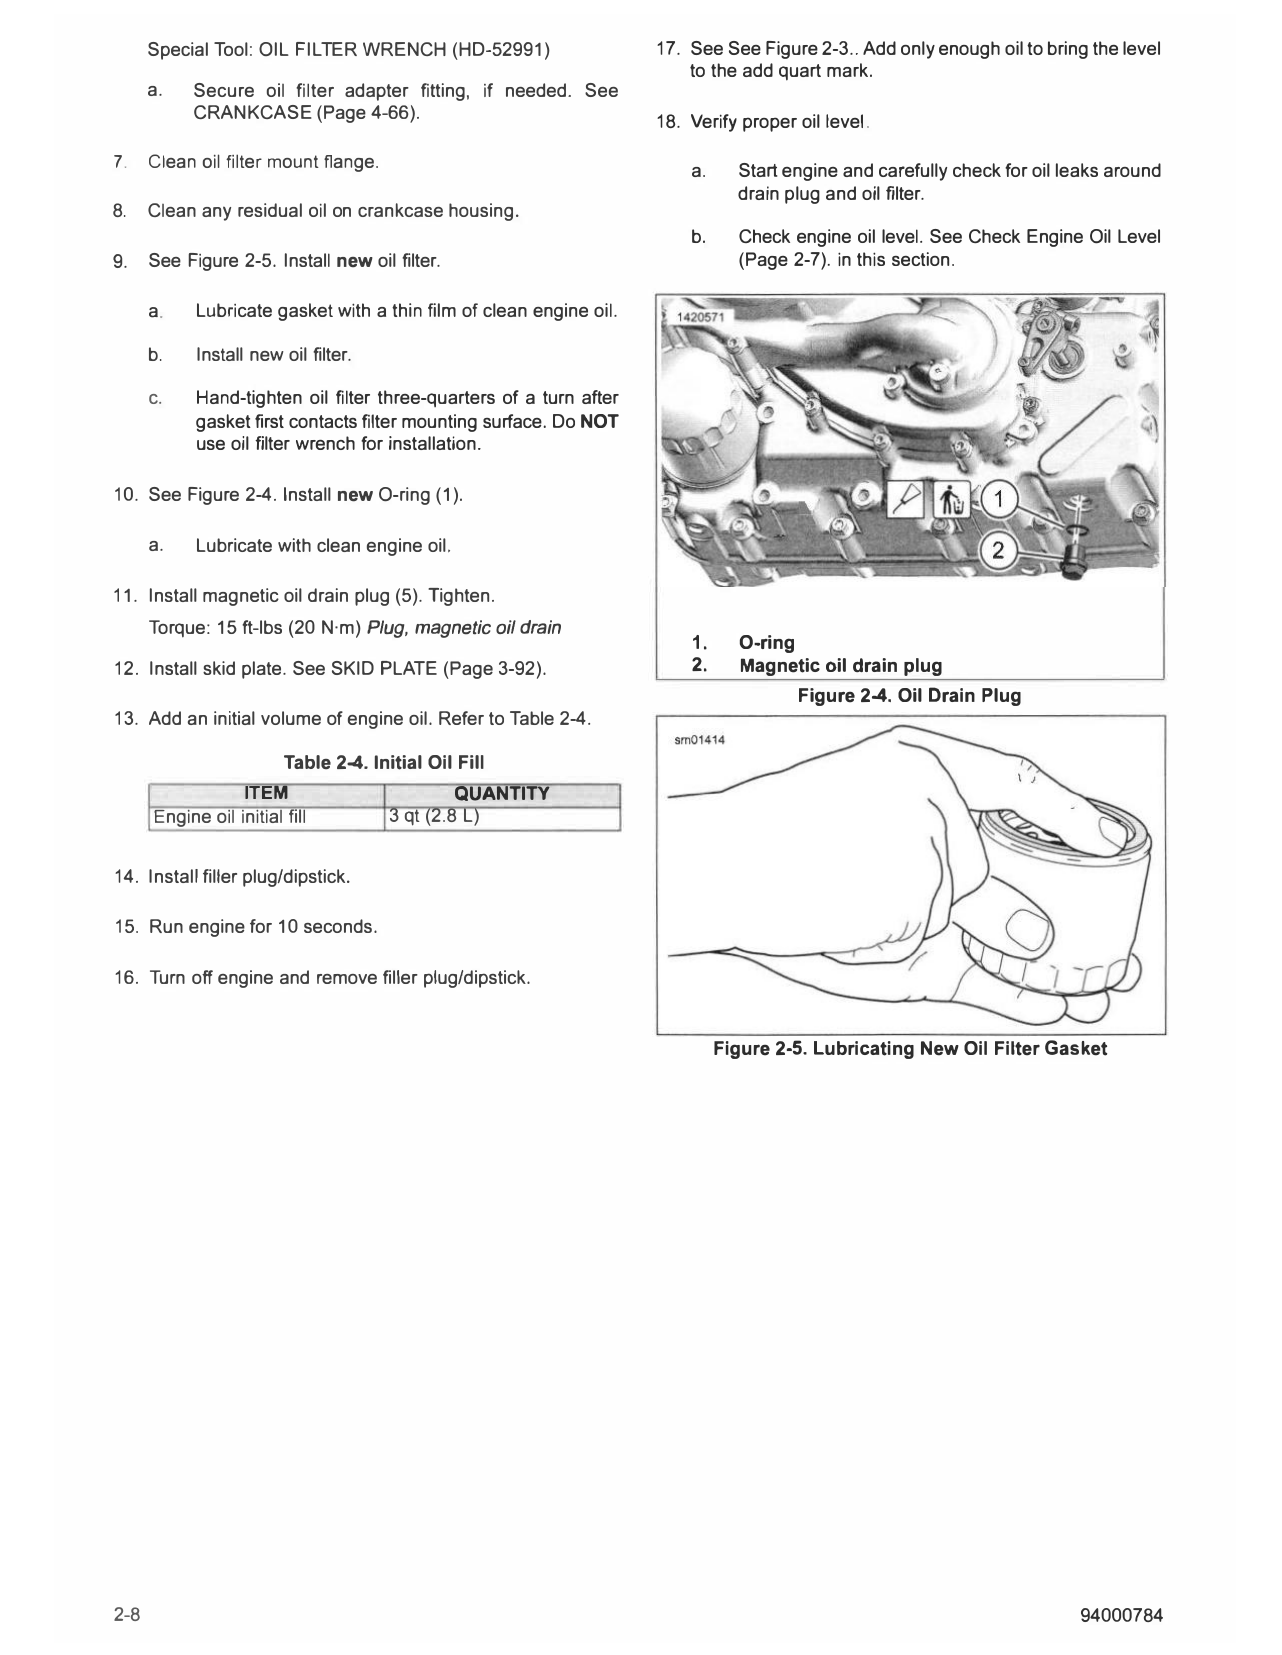
5. See Figure 2-4. Remove magnetic oil drain plug (2). Allow
Figure 2-2. Engine Oil Filler Plug/Dipstick
oil to drain completely.
a. Remove and discard O-ring (1).
6. Remove oil filter using special tool. Do NOT use air tools.
94000784 2-7
Special Tool: OIL FILTER WRENCH (HD-52991) 17. See See Figure 2-3.. Add only enough oil to bring the level
to the add quart mark.
a. Secure oil filter adapter fitting, if needed. See
CRANKCASE (Page 4-66). 18. Verify proper oil level.
7. Clean oil filter mount flange. a. Start engine and carefully check for oil leaks around
drain plug and oil filter.
8. Clean any residual oil on crankcase housing.
b. Check engine oil level. See Check Engine Oil Level
9. See Figure 2-5. Install new oil filter. (Page 2-7). in this section.
a. Lubricate gasket with a thin film of clean engine oil.
b. Install new oil filter.
c. Hand-tighten oil filter three-quarters of a turn after
gasket first contacts filter mounting surface. Do NOT
use oil filter wrench for installation.
10. See Figure 2-4. Install new O-ring (1).
a. Lubricate with clean engine oil.
11. Install magnetic oil drain plug (5). Tighten.
Torque: 15 ft-lbs (20 N·m) Plug, magnetic oil drain
1. O-ring
12. Install skid plate. See SKID PLATE (Page 3-92). 2. Magnetic oil drain plug
Figure 2-4. Oil Drain Plug
13. Add an initial volume of engine oil. Refer to Table 2-4.
Table 2-4. Initial Oil Fill
ITEM QUANTITY
Engine oil initial fill 3 qt (2.8 L)
14. Install filler plug/dipstick.
15. Run engine for 10 seconds.
16. Turn off engine and remove filler plug/dipstick.
Figure 2-5. Lubricating New Oil Filter Gasket
2-8 94000784